15 Best DIY Summer Decor Projects That Anyone Can Make
Summer is finally here, and I couldn’t be more excited to refresh my home with some seasonal touches! There’s something magical about how a few simple decor changes can transform a space and bring that carefree summer energy indoors. The best part? You don’t need to be a crafting expert or spend a fortune to make your home feel like a summer sanctuary.
Over the years, I’ve discovered that DIY summer decor is not only budget-friendly but also incredibly satisfying. I love the personal touch that handmade items bring to my home, and guests always ask about my seasonal decorations. Today, I’m sharing my favorite DIY summer decor projects that truly anyone can make—even if you think you don’t have a creative bone in your body!
These projects use simple materials, require minimal tools, and can be completed in an afternoon. Ready to bring some summer sunshine into your home? Let’s dive in!


1. Mason Jar Coastal Luminaries
There’s something about the soft glow of candlelight that instantly makes a space feel more inviting. These coastal-inspired luminaries bring that beach vibe right to your dining table or patio.
What you’ll need:
- Mason jars (any size works)
- Mod Podge or white craft glue
- Sea salt
- Blue food coloring or craft paint
- Small paintbrush
- Tea lights (regular or LED)
How to make them:
- Mix a few drops of blue food coloring or craft paint with your Mod Podge. I like to make a few different shades of blue for variety.
- Apply the colored Mod Podge to the outside of your mason jar. You can cover the entire jar or create a pattern—I love doing an ombré effect from bottom to top.
- While the glue is still wet, sprinkle sea salt generously over the painted areas. The salt will stick to the glue and create a beautiful, textured “sea glass” effect.
- Let dry completely, which usually takes about 2-3 hours.
- Gently tap off any excess salt and place tea lights inside.
These luminaries look stunning grouped together as a centerpiece, lined up on a mantel, or scattered throughout your outdoor space for evening gatherings. The blue-tinted glass casts the most beautiful, tranquil glow that reminds me of ocean waves.
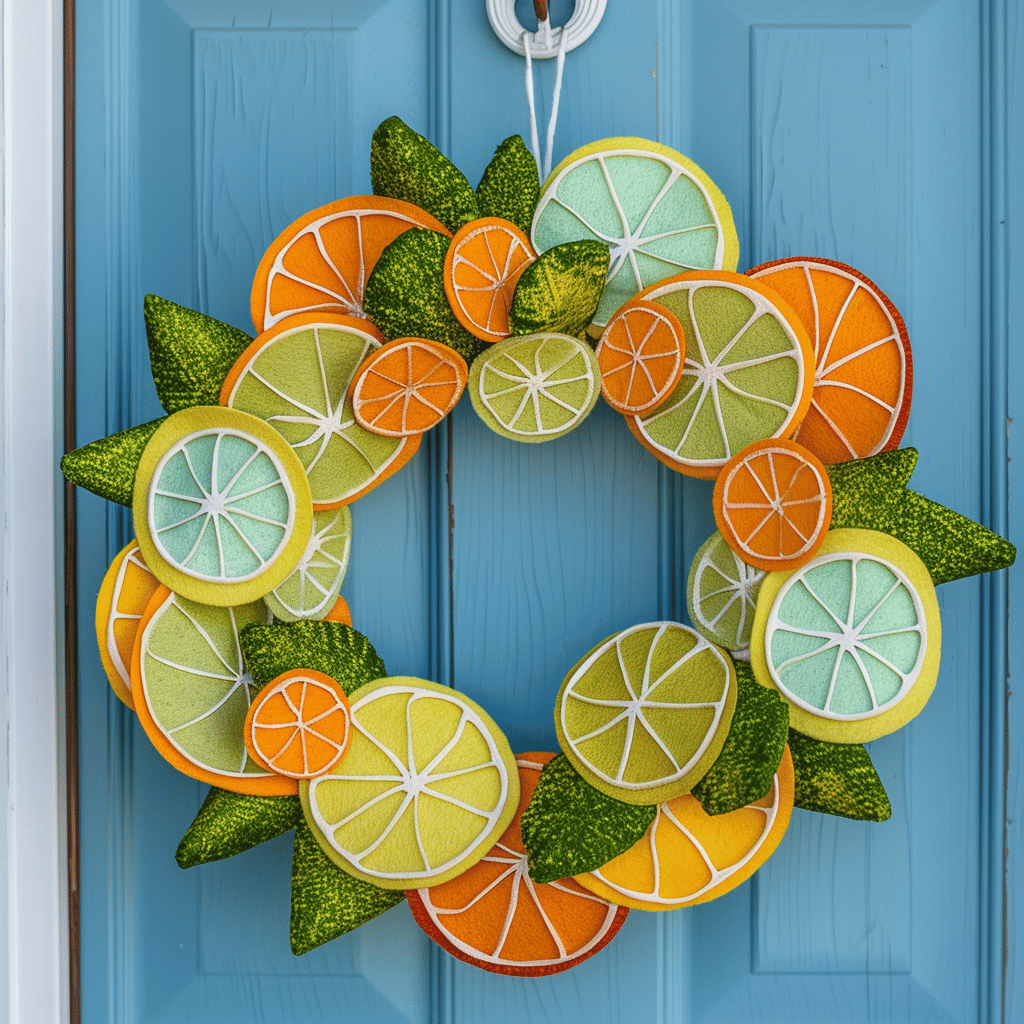
2. Citrus Slice Door Wreath
Nothing says summer quite like bright, juicy citrus fruits! This cheerful wreath makes a statement on your front door and welcomes guests with a pop of color.
What you’ll need:
- Foam wreath form (I use a 12″ one)
- Felt sheets in yellow, orange, and lime green
- Scissors
- Hot glue gun and glue sticks
- Ribbon for hanging
How to make it:
- Cut circles from your felt sheets—aim for about 3-4 inches in diameter. You’ll need approximately 20-30 circles depending on your wreath size.
- Fold each circle in half, then fold in half again to make quarters.
- Cut a small triangle from the center point of each folded circle. When unfolded, this creates the citrus slice “segments.”
- Hot glue your felt slices around the foam wreath, overlapping them slightly. Mix up your colors for a vibrant look!
- Attach a ribbon to the back for hanging.
This wreath brightens up my entryway all summer long, and it’s held up beautifully through several seasons. I’ve even had neighbors knock on my door to ask where I bought it—their reaction when I tell them I made it is priceless!
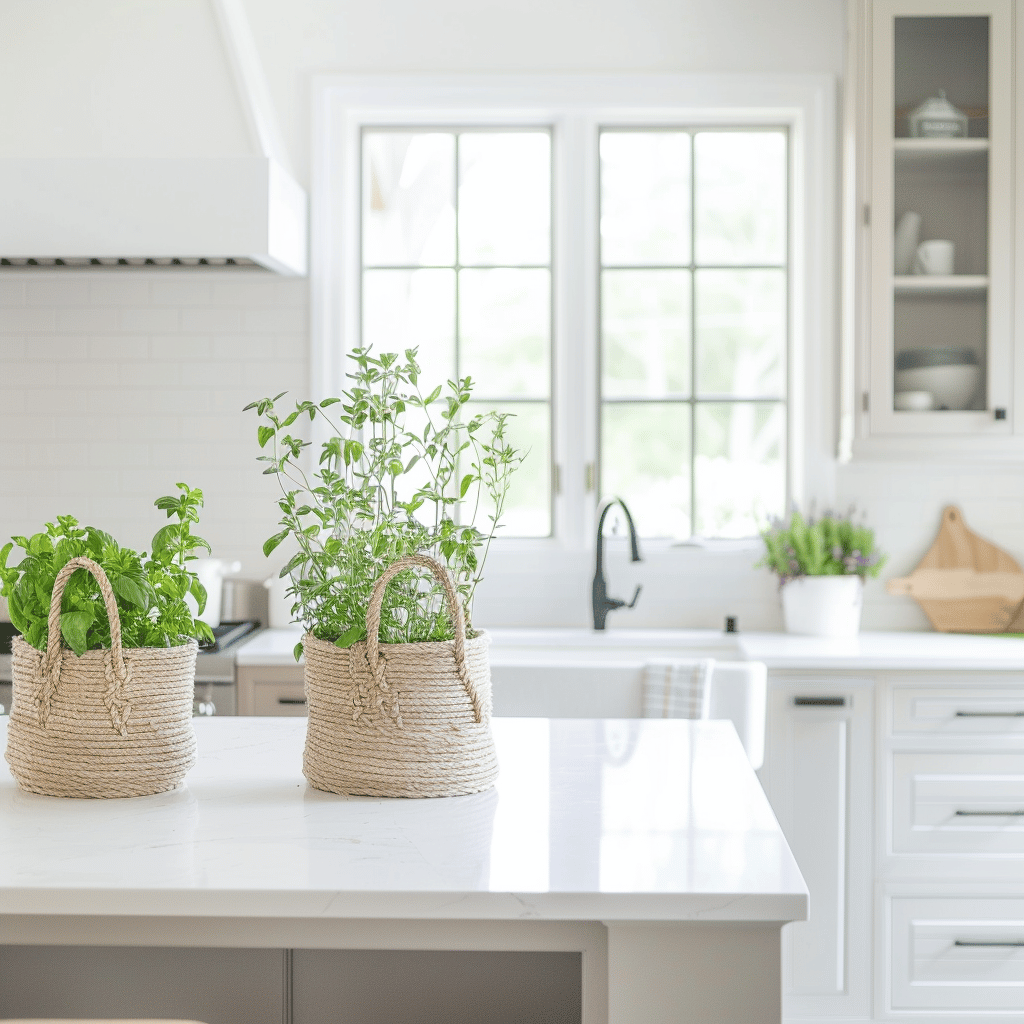
3. Rope Basket Planters
These nautical-inspired basket planters blend coastal charm with modern style. They’re perfect for housing your favorite plants or storing summer essentials.
What you’ll need:
- Plastic container or small bucket (I recycle yogurt tubs)
- Cotton rope (about 1/4″ thick)
- Hot glue gun and glue sticks
- Scissors
- Spray paint (optional)
How to make them:
- Start by gluing the end of your rope to the bottom of your container.
- Continue wrapping the rope around, gluing as you go, until you reach the top of the container.
- Secure the end piece with extra glue and trim any excess.
- If desired, spray paint your basket in a beachy color like turquoise, coral, or crisp white.
I use these versatile baskets to hold everything from small potted herbs on my kitchen windowsill to sunscreen and flip-flops by the back door. They add that perfect touch of summer texture to any space.

4. Pressed Flower Sun Catchers
Capture summer’s beauty by preserving flowers in these delicate sun catchers. They cast the most magical patterns when the sun shines through them!
What you’ll need:
- Pressed flowers and leaves (collect from your garden or buy pre-pressed)
- Clear Con-Tact paper or laminating sheets
- Embroidery hoop or cardboard frame
- Scissors
- String for hanging
How to make them:
- Cut two pieces of Con-Tact paper slightly larger than your frame.
- Peel the backing off one piece and place it sticky-side up on a flat surface.
- Arrange your pressed flowers and leaves in a pleasing design.
- Carefully place the second piece of Con-Tact paper (sticky-side down) over your arrangement.
- Press out any air bubbles gently with your fingers.
- Place your design in the embroidery hoop and trim excess paper.
- Attach string for hanging.
I hang these in my kitchen windows where they catch the morning light. They’re a lovely way to preserve summer blooms long after the season ends.
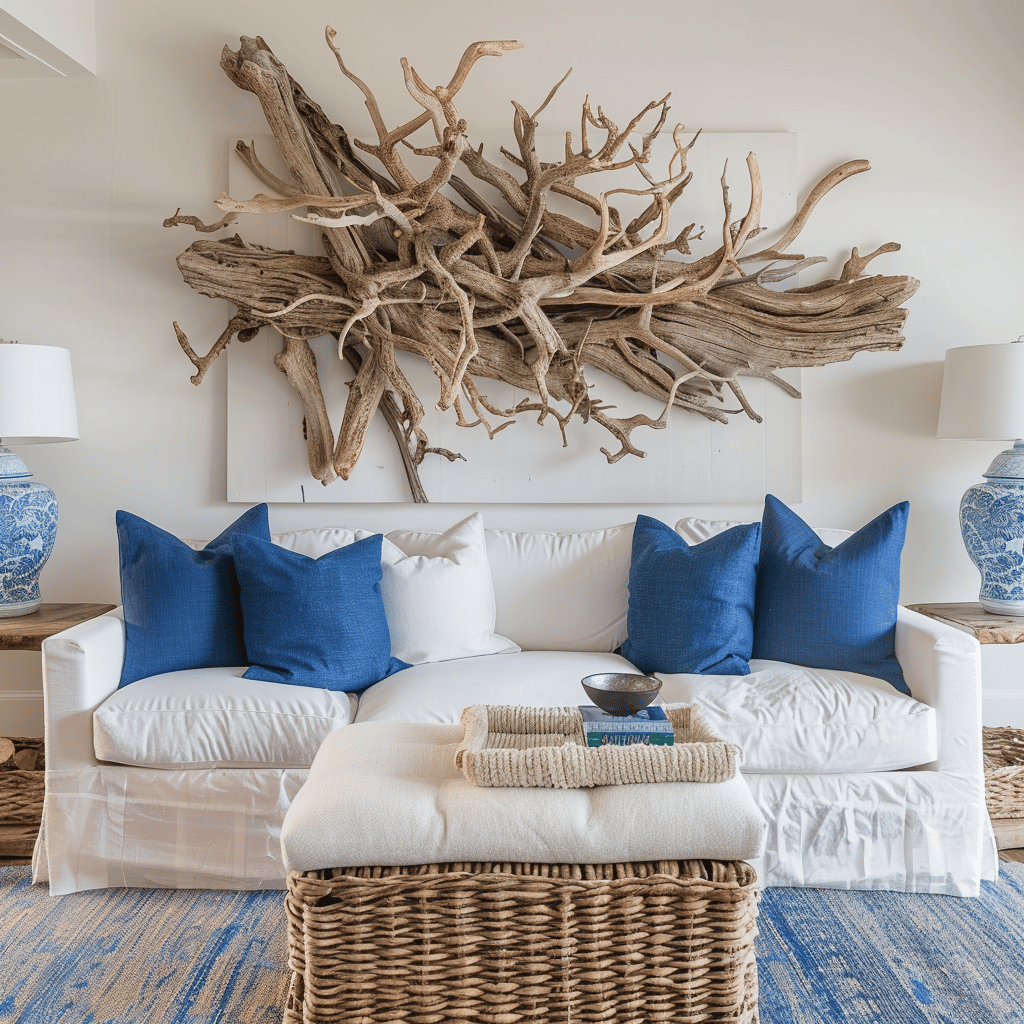
5. Driftwood Wall Art
Bring a piece of the beach home with this simple yet striking wall hanging. It’s the perfect addition to a gallery wall or as a standalone statement piece.
What you’ll need:
- Several pieces of driftwood in varying lengths (collect from beaches or buy at craft stores)
- Strong fishing line or thin wire
- Drill with small bit
- Shells, sea glass, or other beach finds (optional)
- Large stick or dowel for the top
How to make it:
- Arrange your driftwood pieces in order of size, creating a sort of upside-down triangle shape.
- Drill small holes at each end of the driftwood pieces.
- Thread fishing line through the holes, connecting the pieces vertically with about 2 inches of space between each.
- Attach the top piece to your larger stick or dowel.
- If desired, add shells or sea glass by gluing them to some of the driftwood pieces.
This natural art piece brings a sense of calm to my living room and serves as a beautiful reminder of summer beach days.
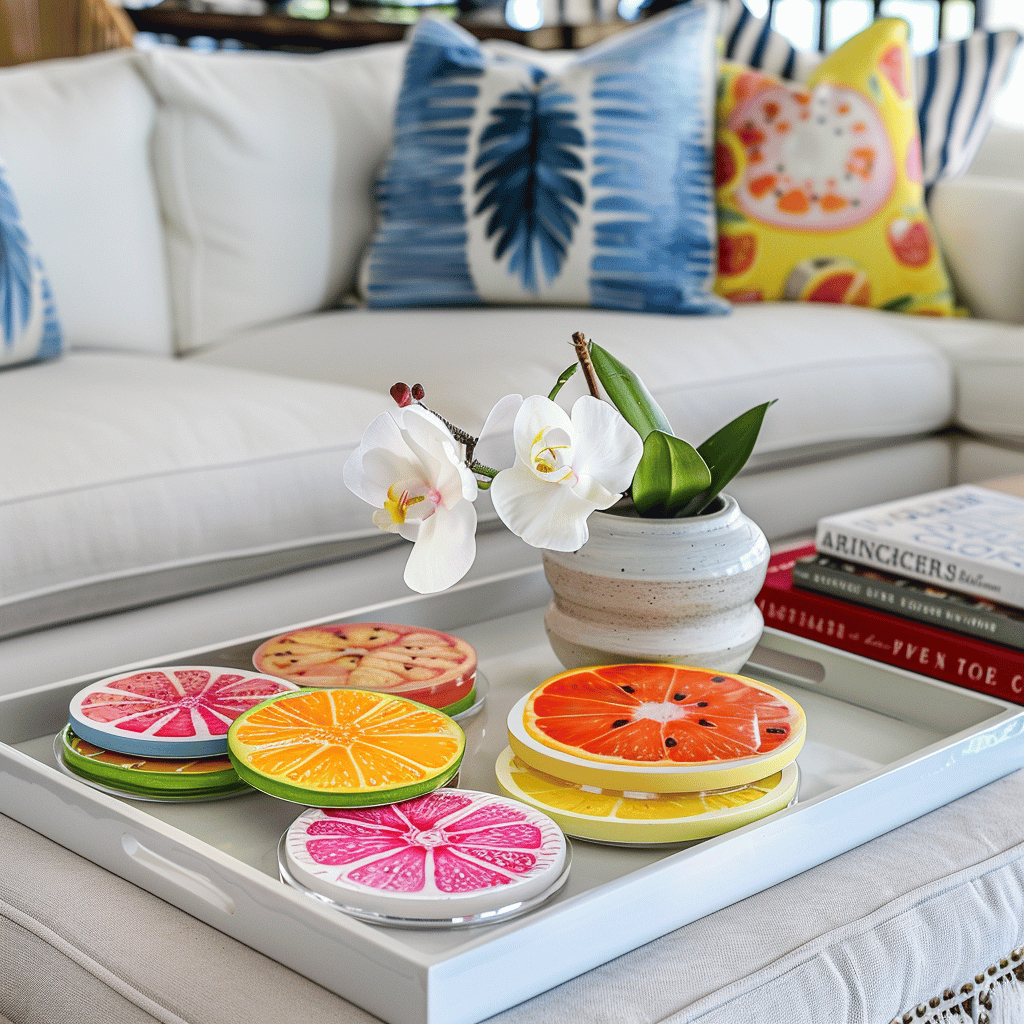
6. Fruit Slice Coasters
Protect your furniture in style with these bright and cheerful coasters that look good enough to eat!
What you’ll need:
- Cork coasters (available at craft stores)
- Acrylic craft paint in fruit colors (yellow, orange, green, pink)
- Small paintbrushes
- Clear acrylic sealer spray
How to make them:
- Paint each cork coaster with a base color—yellow for lemon, orange for, well, orange, green for lime, and pink for grapefruit.
- Once dry, use a fine brush to add the segment lines in a slightly darker shade.
- Add white highlights to create that juicy, realistic look.
- Spray with clear sealer to protect your design and make them waterproof.
These coasters always spark conversation when friends come over for summer drinks! They’re practical but also add a fun pop of color to my coffee table.
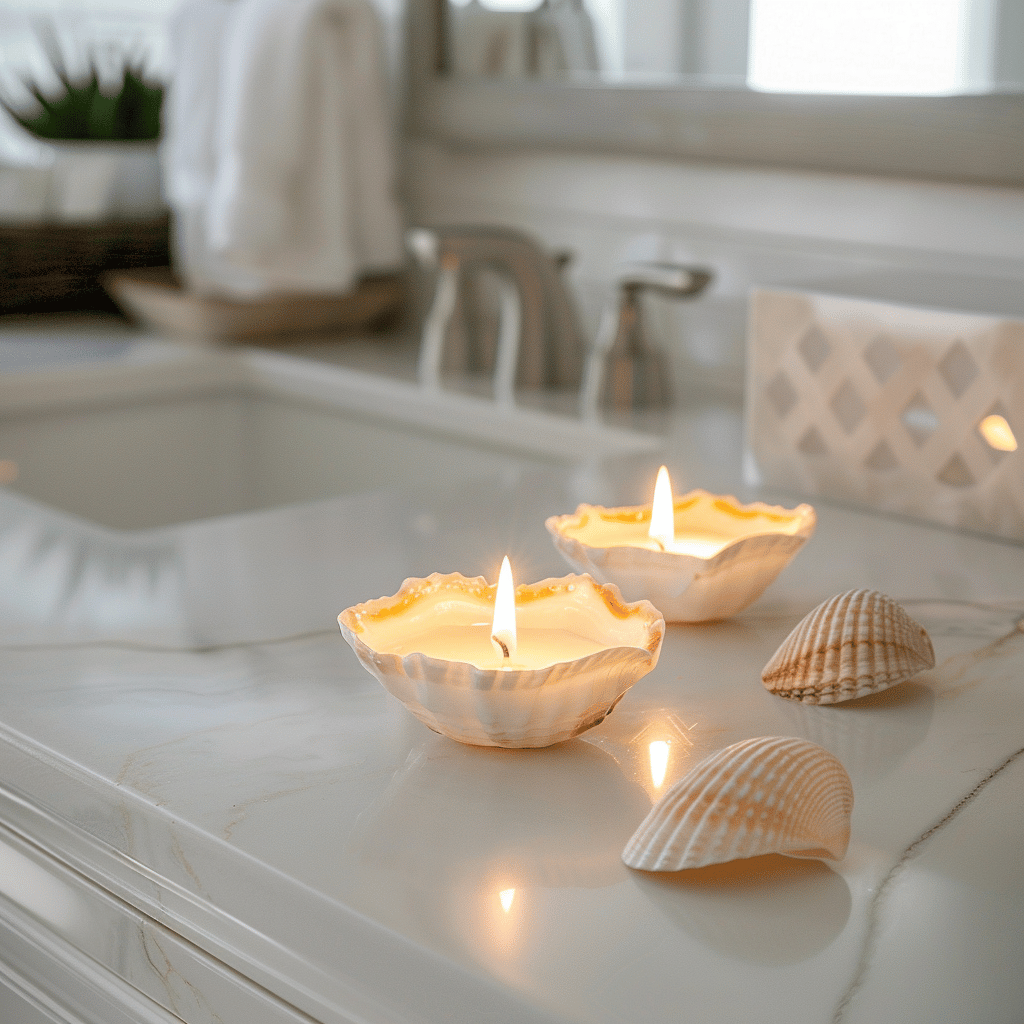
7. Seashell Candles
Turn your beach vacation souvenirs into beautiful, scented keepsakes with these simple DIY candles.
What you’ll need:
- Large, cup-shaped seashells (cleaned and dried)
- Candle wax flakes
- Candle wicks with metal bases
- Essential oils (I love coconut or sea breeze scents for summer)
- Small pot and heat-safe bowl for double boiler
- Hot glue gun
How to make them:
- Secure your wick to the center of each shell using a dot of hot glue.
- Melt your wax flakes using a double boiler setup.
- Add a few drops of essential oil to the melted wax.
- Carefully pour the wax into your shells, leaving about 1/4 inch from the top.
- Hold the wick straight while the wax begins to set.
- Allow to cool completely before trimming the wick to about 1/4 inch.
These natural candles bring the scent and spirit of the beach indoors. I place them on bathroom counters, bedside tables, or group them as a centerpiece for outdoor dining. The shells catch the wax beautifully as the candle burns, creating an ever-evolving piece of decor.

8. Floral Ice Bucket
Elevate your summer entertaining with this stunning ice bucket that keeps your beverages cold while doubling as a gorgeous centerpiece.
What you’ll need:
- Two containers of different sizes (one should fit inside the other with about 1-inch space all around)
- Edible flowers or flower petals
- Distilled water
- Tape
How to make it:
- Place your smaller container inside the larger one.
- Tape the inner container in place so it doesn’t float.
- Fill the space between containers with distilled water about halfway.
- Add your flowers or petals, arranging them against the outer container wall.
- Freeze until solid (usually overnight).
- Add more water, more flowers, and freeze again until completely full.
- To remove, dip the outer container briefly in warm water and slide the ice bucket out.
When I host summer gatherings, this ice bucket never fails to impress my guests. It keeps wine bottles perfectly chilled while adding a magical touch to the table. As it slowly melts, it creates a beautiful puddle of flower-strewn water—I usually place it on a large plate or shallow bowl to catch the melt.
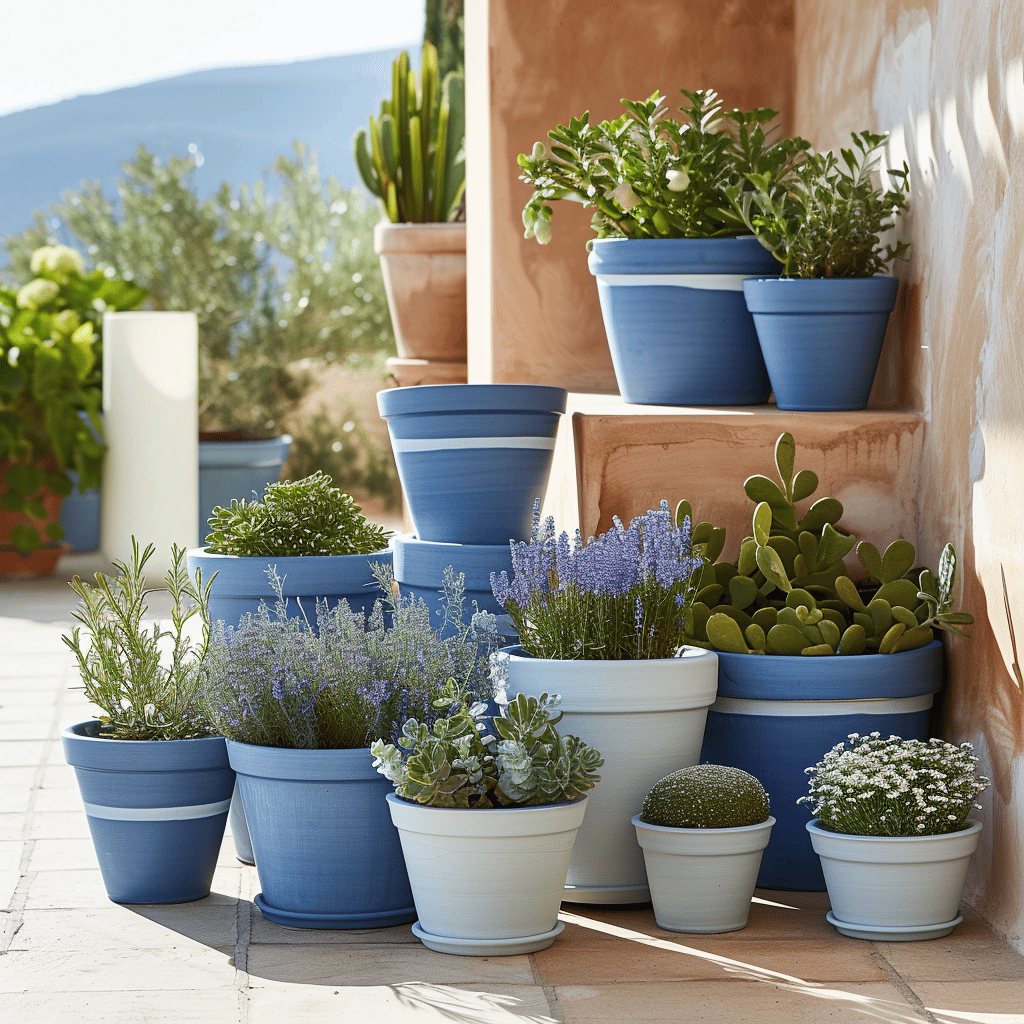
9. Painted Terra Cotta Pots
Give ordinary plant pots a summery makeover with bright colors and fun patterns. This project lets you coordinate your planters with your home’s color scheme.
What you’ll need:
- Terra cotta pots in various sizes
- Acrylic craft paint in summer colors
- Paintbrushes
- Painter’s tape (for creating patterns)
- Clear acrylic sealer spray
How to make them:
- Clean your pots thoroughly and let them dry completely.
- Apply a base coat of paint and allow to dry.
- Use painter’s tape to create stripes, color blocks, or geometric designs.
- Paint your design and remove tape while the paint is still slightly wet for clean lines.
- Once completely dry, spray with a clear sealer to protect from water damage.
I’ve created a collection of pots in shades of blue, turquoise, and white for a coastal theme on my patio. In my kitchen, I have smaller pots in citrus colors for my herb garden. The possibilities are endless!

10. Nautical Rope Mirror
This project transforms a basic mirror into a statement piece that adds coastal flair to any room.
What you’ll need:
- Round mirror (unframed)
- Thick cotton rope
- Hot glue gun and plenty of glue sticks
- Scissors
- D-ring picture hanger
How to make it:
- Starting at any point on the mirror’s edge, apply a generous amount of hot glue.
- Press the end of your rope into the glue and hold until secure.
- Continue working your way around the mirror, applying glue and pressing rope in small sections.
- When you complete the circle, trim the rope end at an angle for a clean finish and glue it down.
- Attach a D-ring to the back for hanging.
This mirror hangs in my entryway, where it reflects light and makes the space feel larger. The nautical rope gives it that perfect summer coastal vibe without being too theme-y.

11. Herb Garden Window Box
Bring the garden right to your kitchen with this practical and beautiful herb garden that doubles as decor.
What you’ll need:
- Wooden window box or long planter
- Outdoor paint or stain
- Potting soil
- Herb plants or seeds (basil, mint, rosemary, thyme work great)
- Decorative rocks or pebbles
- Small garden tools
How to make it:
- Paint or stain your window box in a summery color that complements your decor.
- Fill the bottom with a layer of rocks for drainage.
- Add potting soil, leaving about an inch at the top.
- Plant your herbs, arranging taller varieties at the back.
- Place decorative pebbles on top of the soil for a finished look.
I keep mine on my kitchen windowsill where it’s convenient for cooking, but it also adds a fresh, lively element to the room. There’s nothing quite like snipping fresh herbs for summer recipes, and the fragrance is absolutely divine!

12. Hanging Shell Wind Chime
Create a gentle summer soundtrack with this delicate wind chime that captures the essence of beach days.
What you’ll need:
- Driftwood piece or sturdy branch (about 12-18 inches long)
- Collection of shells with holes or you can drill them
- Fishing line or thin jewelry wire
- Beads in ocean colors (optional)
- Drill with small bit (if your shells need holes)
How to make it:
- Select a variety of shells in different sizes and shapes.
- If needed, carefully drill small holes near the top of each shell.
- Cut fishing line in varying lengths.
- Thread shells onto the lines, adding beads if desired.
- Tie each line securely to your driftwood piece, spacing them evenly.
- Add a hanging loop at the top center of the driftwood.
I hang mine on my covered porch where the gentle summer breeze creates a soft, tinkling sound that reminds me of walks along the shore. It’s both visual and auditory decor!
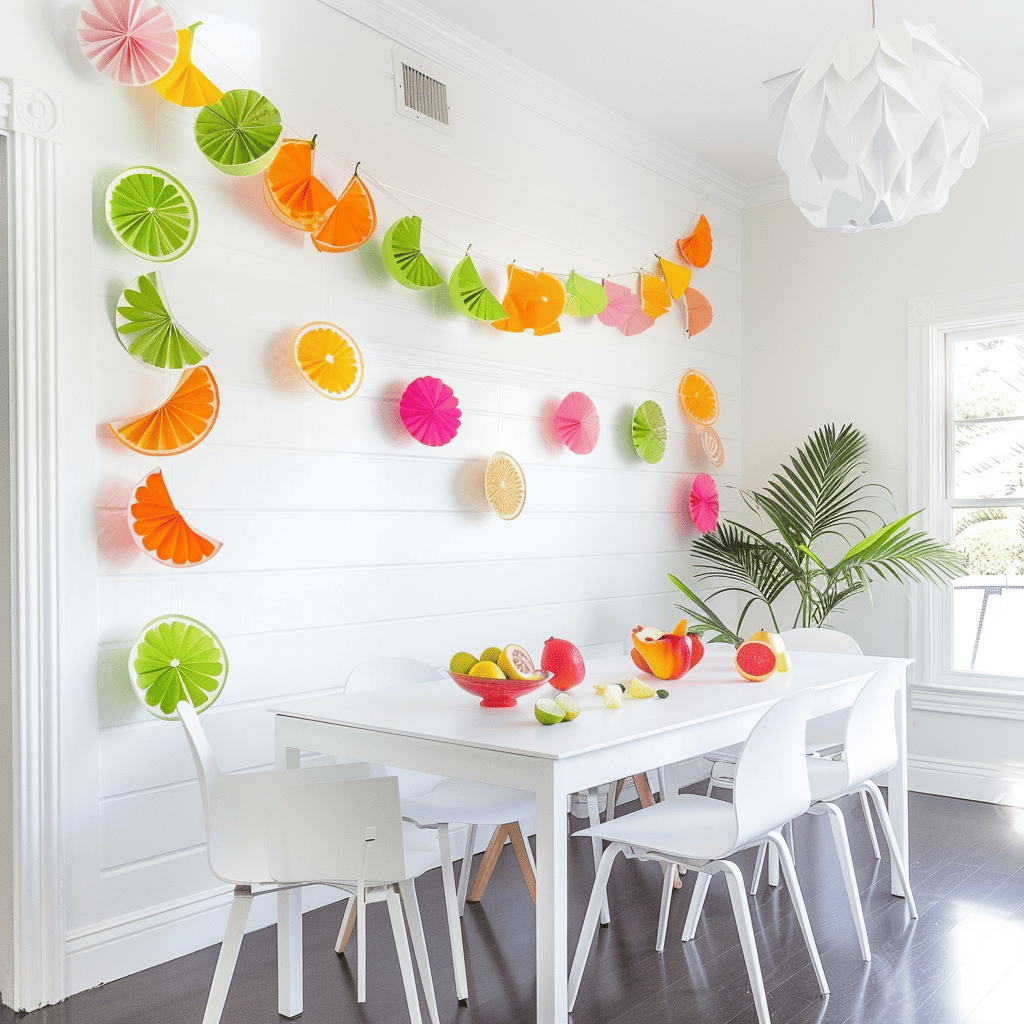
13. Summer Fruit Garland
This colorful paper garland brings cheer to any space and can be made in an afternoon.
What you’ll need:
- Colored cardstock (yellow, red, orange, green)
- Scissors or craft knife
- String or baker’s twine
- Hole punch
- Fruit templates (you can draw or print simple shapes)
How to make it:
- Trace or print fruit shapes onto appropriate colored cardstock—lemons, watermelons, oranges, and limes work beautifully.
- Cut out your shapes carefully.
- Use a hole punch to create holes at the top of each fruit.
- Thread your string through each piece, spacing them evenly.
- Hang across windows, doorways, or along walls.
This simple garland brightens up my dining area all summer long. It’s lightweight enough to move around as my decor needs change, and it stores flat for next year!

14. Beachy Votive Holders
These simple candle holders bring sandy beach vibes to any tabletop.
What you’ll need:
- Clear glass votive holders (inexpensive ones from dollar stores work great)
- Mod Podge or craft glue
- Fine sand
- Small shells or sea glass pieces
- Twine or jute cord
- Tea lights
How to make them:
- Apply Mod Podge to the lower half of each glass holder.
- Roll in fine sand until completely covered.
- Once dry, apply small dots of glue and attach tiny shells or sea glass.
- Wrap a piece of twine around the top and tie in a small bow.
- Place tea lights inside.
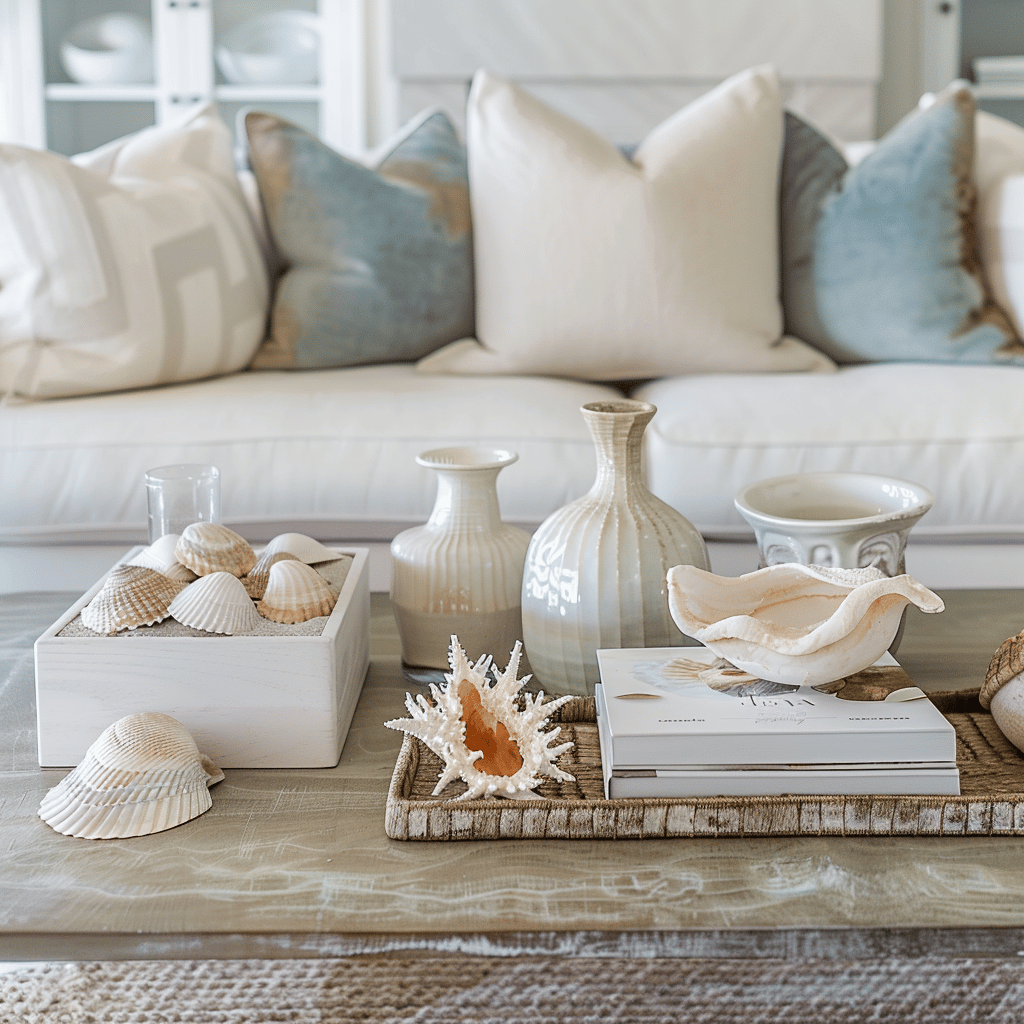
These create the most beautiful, warm glow on summer evenings. I cluster them on my coffee table or line them up along my dining table for casual dinners.
15. Summer Serving Tray Makeover
Transform an old tray into a statement piece perfect for summer entertaining.
What you’ll need:
- Wooden serving tray
- Outdoor or multi-surface paint
- Stencils for summer patterns (pineapples, palms, etc.)
- Clear polyurethane spray
- New handles (optional)
How to make it:
- Sand your tray lightly to help the paint adhere.
- Apply a base coat of paint and let dry completely.
- Use stencils to add summer-themed designs.
- Seal with several coats of polyurethane for durability.
- If desired, replace the handles with new ones that match your design.
I use mine for serving drinks on the patio, but it also makes a great catchall for summer essentials on my coffee table. The bright colors instantly lift the mood of any space!

Final Thoughts
Summer decor doesn’t have to be complicated or expensive to make a big impact. These simple DIY projects allow you to infuse your home with seasonal charm without breaking the bank. What I love most about handmade decor is how it tells a story—each piece carries memories of sunny afternoons spent creating and the joy of seeing your vision come to life.
Remember, perfection isn’t the goal here. The slight variations and personal touches are what make DIY decor special. So gather your supplies, put on some summery music, and enjoy the creative process. Your home will thank you for the refresh, and you’ll enjoy the satisfaction of saying “I made that!” when guests compliment your seasonal style.
Which project will you try first? I’d love to hear about your summer decorating adventures! Share your creations or questions in the comments below.
Happy crafting and happy summer!
If you love home decor and interior design as much as I do, check out these other articles I think you might like.
Summer Styling: Decorating with Seasonal Flowers and Plants
Below is a video that when played on your TV can turn your TV into a piece of art. There are hundreds of different videos to choose from.


Statement Lighting for Summer: String Lights to Chandeliers
May 16, 2025 @ 1:27 pm
[…] 15 DIY Summer Decor Projects That Anyone Can Make […]
Summer Mantel Styling : From Fireplaces to Shelving Displays
May 17, 2025 @ 1:41 pm
[…] 15 DIY Summer Decor Projects That Anyone Can Make […]
5 Summer Decor Trends to Skip (And What to Try Instead)
May 18, 2025 @ 2:50 pm
[…] 15 DIY Summer Decor Projects That Anyone Can Make […]
How to Create Perfect Summer Gallery Walls: Seasonal Art
May 19, 2025 @ 3:02 pm
[…] 15 DIY Summer Decor Projects That Anyone Can Make […]
Summer Window Box : My Journey to Gorgeous Curb Appeal
May 20, 2025 @ 12:11 pm
[…] 15 DIY Summer Decor Projects That Anyone Can Make […]
Summer Decor for Small Outdoor Spaces
July 12, 2025 @ 5:54 pm
[…] 15 DIY Summer Decor Projects That Anyone Can Make […]