Enchanted Forest Party Magic: Your Complete Guide
I’ve always been enchanted by the mystical beauty of woodland settings. There’s something absolutely magical about transforming your space into an enchanted forest that makes guests feel like they’ve stepped into a fairy tale. When I first planned my enchanted forest party, I knew I wanted to create something truly special – a celebration that would transport everyone into a world of wonder and whimsy.


Creating Your Enchanted Forest Foundation
The secret to a stunning enchanted forest party lies in layering natural elements. I start with the color palette, focusing on rich earthy greens, warm browns, and touches of gold. These colors form the backbone of your magical woodland setting.
Lighting Sets the Mood
Fairy lights are absolutely essential. I string warm white LED fairy lights everywhere – along walls, around doorframes, and cascading from the ceiling. The soft, twinkling glow instantly creates that magical atmosphere we’re after. Battery-operated string lights work perfectly for areas without outlets.
I also use lanterns of varying sizes. Mason jar lanterns filled with fairy lights create beautiful focal points. Place them on tables, hang them from branches, or cluster them in corners. The warm glow makes everything feel cozy and mystical.

Building Your Woodland Atmosphere
Bringing the Forest Indoors
Real branches are game-changers for this theme. I collect sturdy branches from my yard or local park (with permission, of course). These become the foundation for hanging decorations and creating height variation throughout the space.
Here’s how I use branches effectively:
- Tall branches in large vases create instant forest vibes
- Medium branches can be attached to walls as natural shelving
- Small twiggy branches work perfectly for centerpieces
Moss-Covered Magic
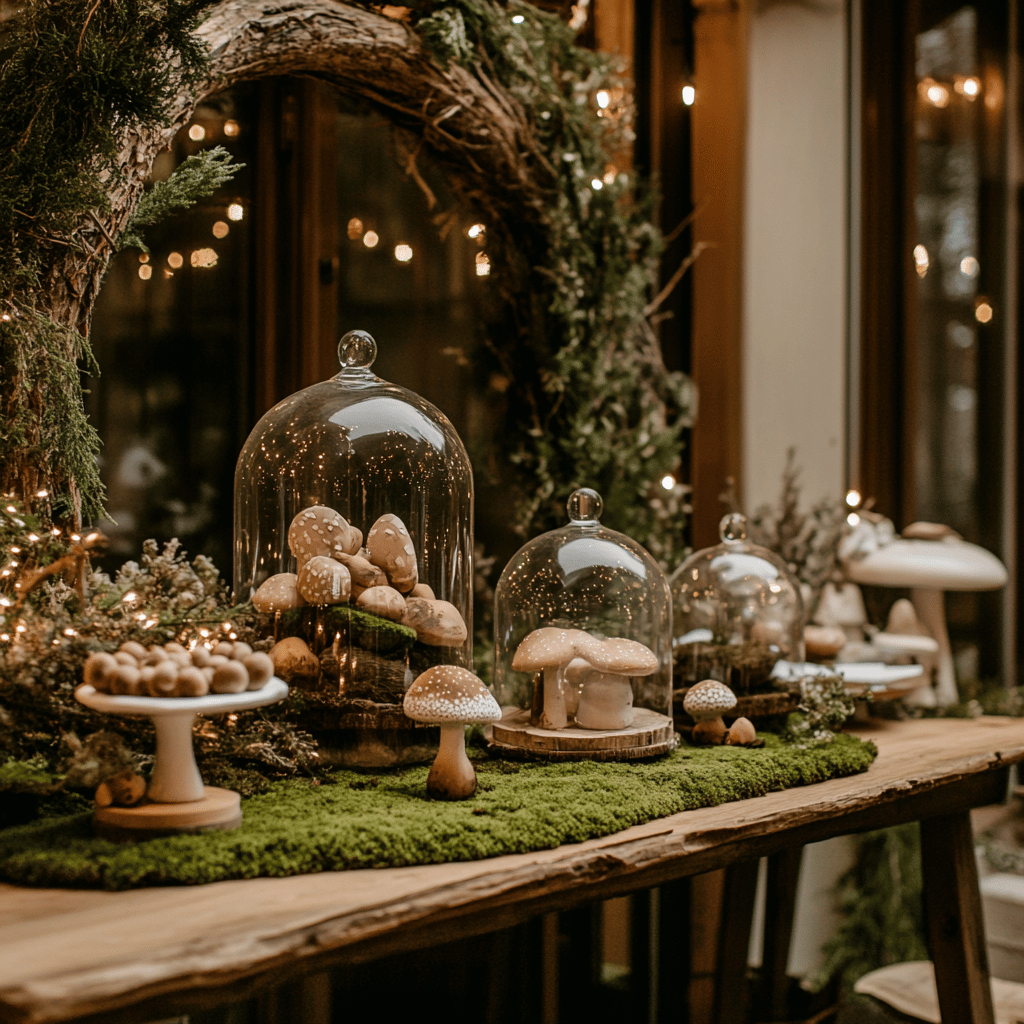
Moss adds incredible texture and authenticity to your enchanted forest. I use both real and artificial moss, depending on the application. Real moss works beautifully for table runners and centerpieces, while artificial moss is perfect for covering larger surfaces or areas that guests might touch frequently.
I cover picture frames, vases, and even furniture edges with moss. It creates this wonderful organic feel that makes everything look like it’s been touched by forest magic. Sheet moss from craft stores is my go-to – it’s easy to work with and looks incredibly realistic.
Mushroom Magic and Woodland Creatures
Creating Mushroom Wonderlands
Mushrooms are essential for that fairy tale forest feel. I use a mix of artificial mushrooms in various sizes. Red and white spotted toadstools are classic, but I also love incorporating brown, cream, and even some with subtle glitter for extra magic.
I cluster mushrooms at different heights throughout the space. Large mushrooms work as floor decorations, while smaller ones are perfect for table settings. I even create mushroom “rings” on the ground using battery-operated mushroom lights – they look absolutely enchanting in dim lighting.
Adding Woodland Friends
Subtle woodland creature decorations enhance the forest theme beautifully. I incorporate small deer figurines, owl decorations, and even some fairy figurines. The key is restraint – you want to suggest the presence of forest creatures without overwhelming the space.
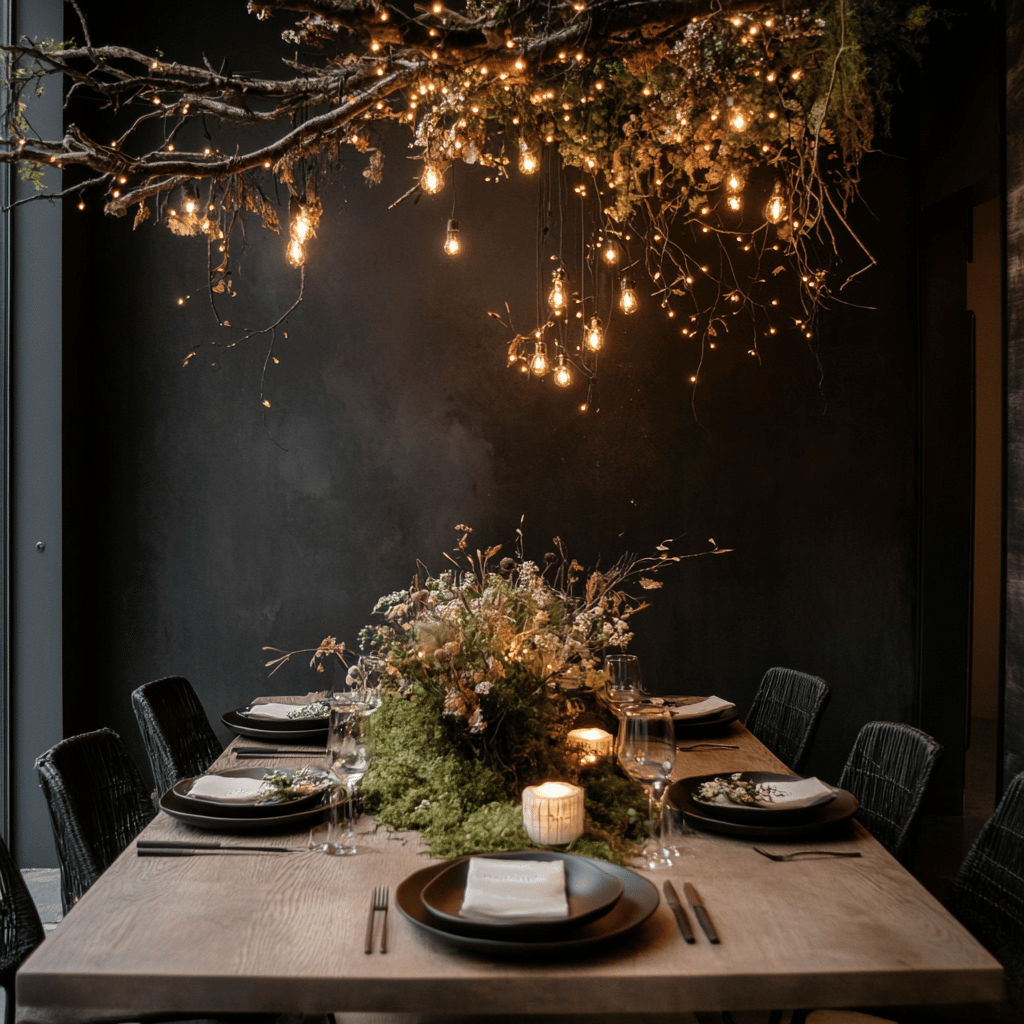
Table Setting Magic
Natural Table Runners
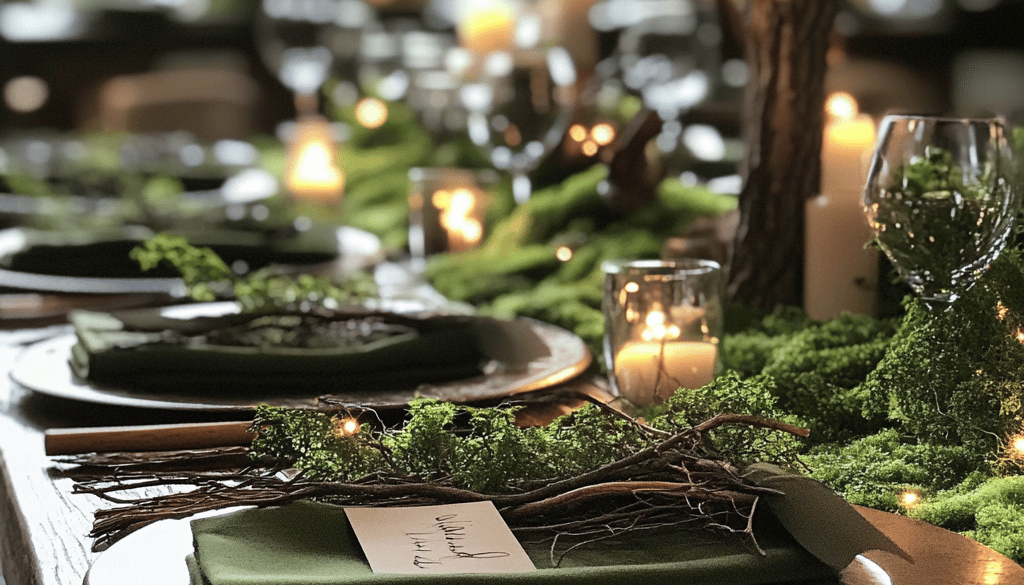
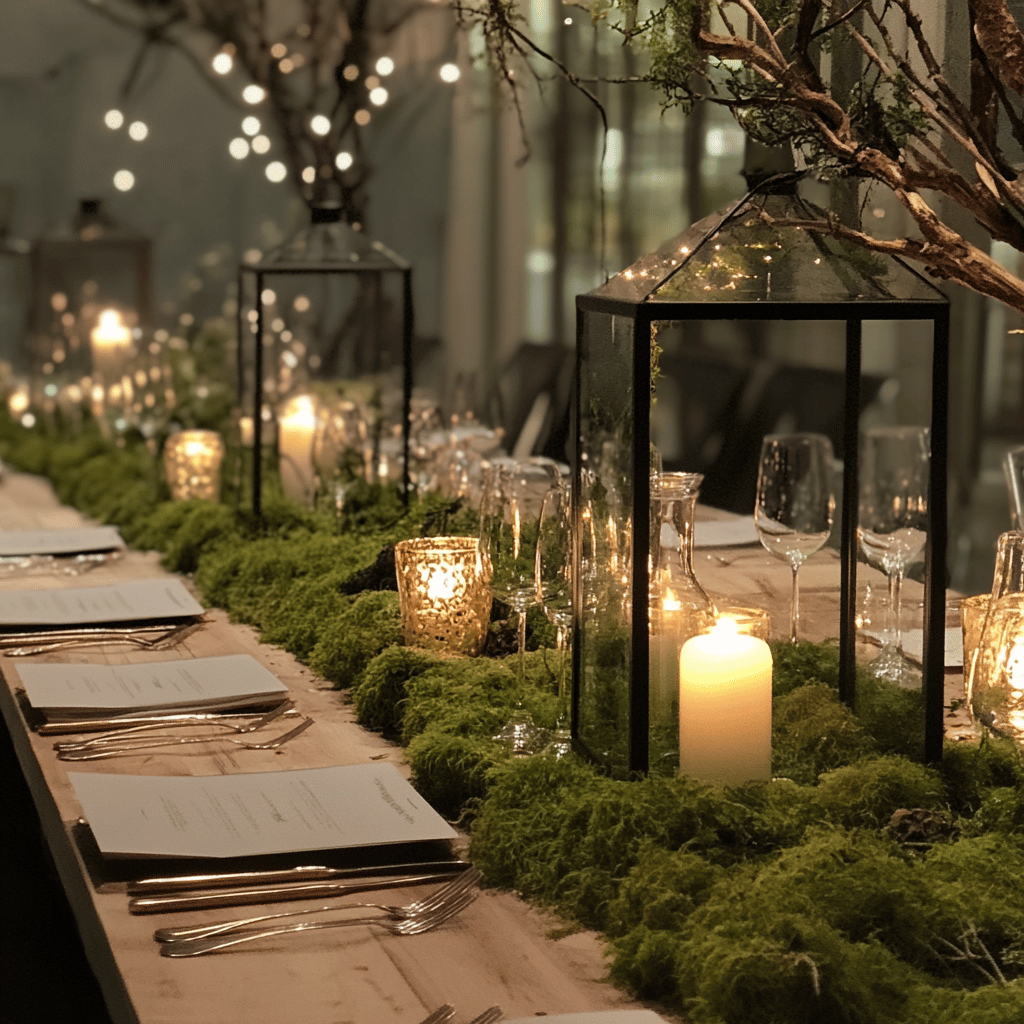
I create stunning table runners using a combination of moss, small branches, and fairy lights. Start with a base of burlap or natural linen, then layer on sheet moss. Weave fairy lights throughout and add small branches, pinecones, and mushrooms for depth.
Enchanted Centerpieces
My favorite centerpieces combine height with natural elements. I use varying heights of glass cylinders or lanterns, filling some with fairy lights and others with natural elements like pinecones, acorns, and small branches. Surrounding these with moss and small mushrooms creates magical focal points.
Place Setting Details
Each place setting gets special attention. I tie small twigs together with twine to create natural napkin rings. Menu cards printed on kraft paper and tied with forest green ribbon add elegant woodland touches. Small potted herbs or succulents make beautiful take-home favors while doubling as place card holders.

Creating Enchanted Zones
The Fairy Garden Corner
I designate one area as a special fairy garden zone. This space features more delicate decorations – tiny fairy doors attached to walls, miniature furniture, and extra dense fairy lighting. It becomes a magical photo spot that guests absolutely love.
The Woodland Lounge
I create a cozy seating area using earth-tone cushions and throws arranged on the floor or low seating. Surround this space with larger branches and lanterns to create an intimate woodland grove feeling. It’s perfect for conversation and really makes guests feel immersed in the forest theme.

Wall and Ceiling Transformations
Branch Installations
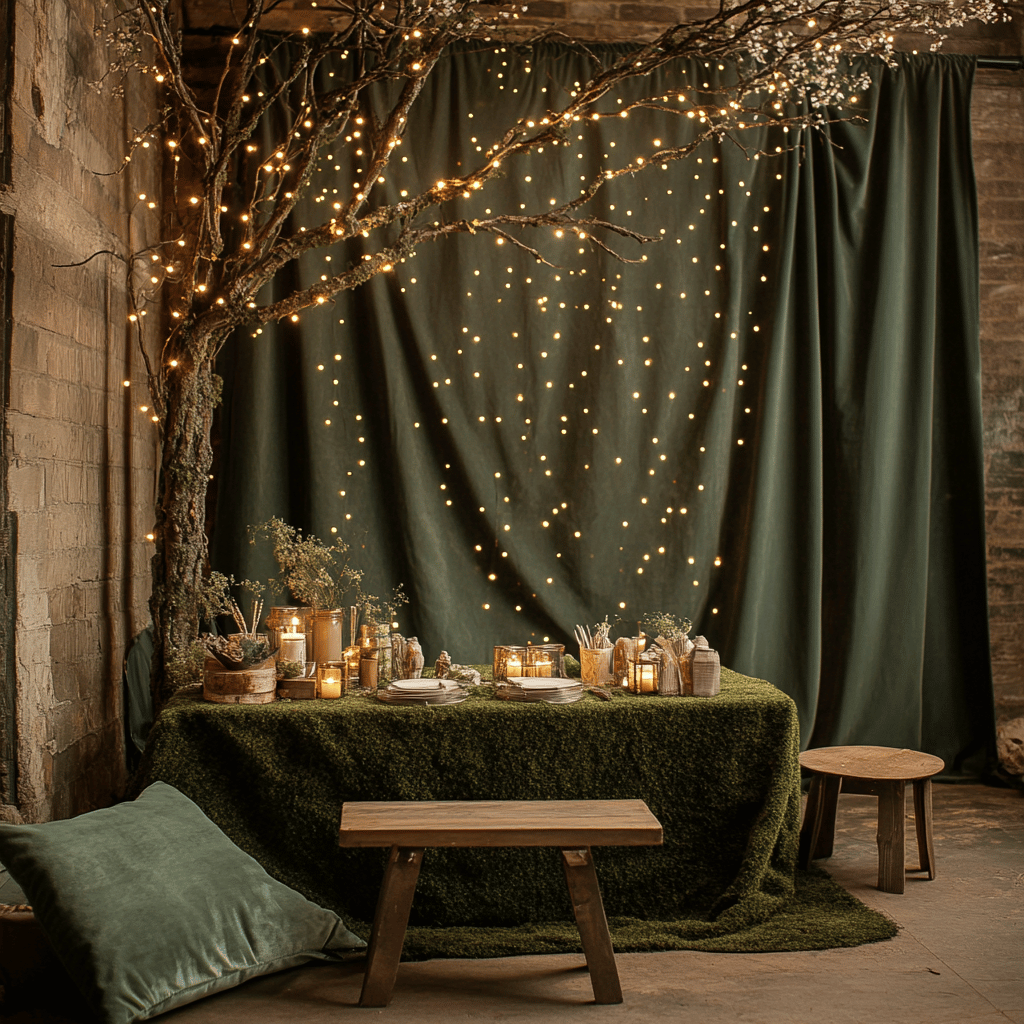
I attach branches directly to walls using removable adhesive hooks. This creates the illusion that trees are growing through your space. The branches serve as natural hangers for fairy lights, small lanterns, and lightweight decorations.
Ceiling Magic
The ceiling is prime real estate for enchanted forest magic. I drape fabric in forest greens and browns to create a canopy effect. Hanging branches from ceiling hooks adds incredible dimension. Battery-operated fairy lights woven throughout create a starry night effect.
Living Wall Elements
Artificial ivy and ferns attached to walls create lush, forest-like backdrops. I use removable wall adhesive to attach these elements, ensuring no damage to the walls. The greenery adds life and reinforces that outdoor forest feeling.
DIY Decorating Projects
Fairy Light Branches
I wrap fairy lights around branches to create illuminated trees. These work beautifully as floor decorations or table centerpieces. Use brown floral tape to secure lights and hide wires for a more natural look.
Moss-Covered Letters
Large cardboard letters covered in moss spell out party-related words like “MAGIC” or the guest of honor’s name. These make stunning focal points and photo props.
Enchanted Potion Bottles
I collect various glass bottles and jars, removing labels and filling them with colored water, glitter, and fairy lights. These “magic potions” add whimsical touches throughout the space.

Food and Drink Magic
Enchanted Forest Punch
This magical drink captures the essence of the forest in a glass. I combine:
- 4 cups apple juice
- 2 cups ginger ale
- 1 cup cranberry juice
- Fresh mint leaves
- Sliced green apples
- Ice
Mix everything in a large punch bowl and garnish with fresh mint sprigs. The beautiful green color looks absolutely magical, and the flavors are refreshing and forest-inspired.
Woodland Mushroom Appetizers
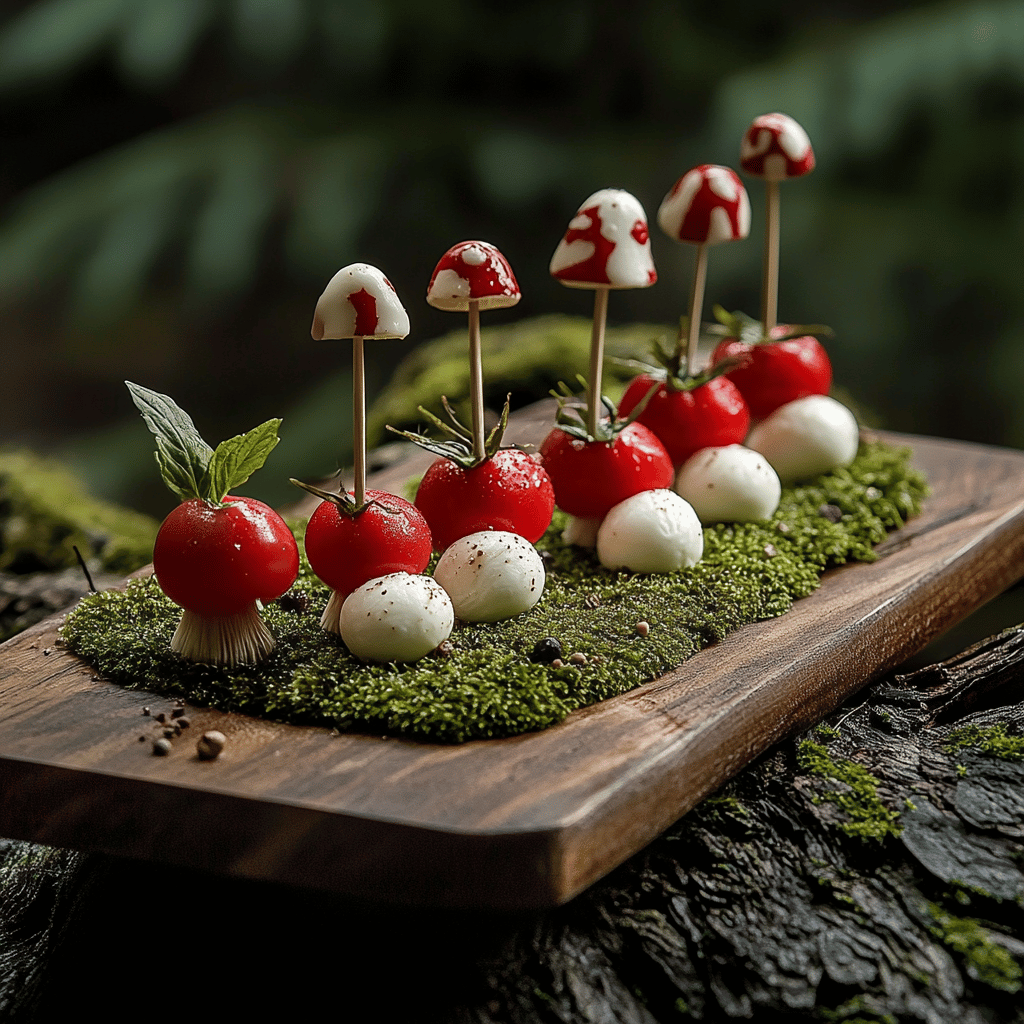
These adorable mushrooms are actually caprese skewers in disguise:
- Cherry tomatoes (red mushroom caps)
- Mozzarella balls (mushroom stems)
- Fresh basil leaves
- Balsamic glaze
Thread mozzarella, basil, and tomato onto small skewers. Drizzle with balsamic glaze and arrange on a moss-covered serving tray. They look like tiny toadstools but taste absolutely delicious.

Lighting Layering Techniques
Ambient Lighting
I use multiple light sources at different levels. Floor lamps with warm bulbs provide base lighting, while fairy lights create magical twinkles. Candles (real or battery-operated) add intimate warmth to seating areas.
Accent Lighting
Spotlights can highlight specific decorative elements like large branch installations or fairy garden corners. I use small LED spotlights to create dramatic shadows and depth.
Final Magical Touches
Sound and Scent
I play soft nature sounds or Celtic music to enhance the woodland atmosphere. Essential oil diffusers with pine or eucalyptus scents complete the sensory experience.
Interactive Elements
I set up a small area where guests can make their own fairy doors or decorate small pots for take-home plants. These activities keep the magic going throughout the party.
Photo Opportunities
I create multiple photo spots with different magical backdrops. A throne made from branches and draped with fabric becomes perfect for portrait photos. The fairy garden corner provides intimate photo opportunities.
Budget-Friendly Tips
Creating an enchanted forest doesn’t have to break the bank. I collect natural elements like branches, pinecones, and stones throughout the year. Dollar store finds like battery lights and glass vases work perfectly when styled thoughtfully.
Many decorations can be made rather than bought. Covering items with moss, creating your own fairy lights installations, and making mushroom decorations from craft supplies saves money while adding personal touches.
Planning Timeline
I start collecting branches and natural elements weeks in advance. Three days before the party, I begin major decorating projects like moss-covered items. The day before, I set up lighting and arrange furniture. On party day, I add fresh elements like flowers and finish with final magical touches.
Storage and Reuse
Most enchanted forest decorations store well for future use. I carefully pack moss-covered items, coil fairy lights properly, and store branches in a dry place. This makes future woodland-themed events much easier to execute.
Creating an enchanted forest party is about embracing the magic of nature and bringing it indoors. Every fairy light, every moss-covered surface, and every carefully placed mushroom contributes to the spell you’re casting for your guests. The joy on their faces when they step into your magical woodland makes every effort worthwhile.
The beauty of this theme lies in its versatility. Whether you’re celebrating a birthday, hosting a seasonal gathering, or just wanting to add magic to any occasion, the enchanted forest theme creates memories that last long after the party ends. Your guests will leave feeling like they’ve been part of something truly special – a night spent in an enchanted world where magic feels completely real.
Below is a video that when played on your TV can turn your TV into a piece of art. There are hundreds of different videos to choose from.

