DIY Bookshelves: Creative and Budget-Friendly Ideas for 2024
Introduction
Are you looking to add some stylish and functional storage to your home without spending a fortune? DIY bookshelves are the perfect solution! Not only can you customize them to fit your space and style, but building your own bookshelves is also a rewarding project that anyone can tackle. Whether you’re a seasoned DIY enthusiast or just getting started, we’ve got you covered with creative and budget-friendly ideas. In this guide, we’ll walk you through everything you need to know to create beautiful, custom bookshelves that will transform your home.
Benefits of DIY Bookshelves
DIY bookshelves offer several advantages that make them an excellent choice for your home decor. Here are some compelling reasons to consider building your own:
Cost Savings Compared to Store-Bought Options
One of the primary benefits of DIY bookshelves is the cost savings. Store-bought bookshelves can be expensive, especially for high-quality or custom pieces. By building your own, you can achieve a luxurious look at a fraction of the cost.
Customization to Fit Your Space and Style
DIY bookshelves allow you to customize the size, shape, and design to perfectly fit your space and match your decor. Whether you need a small corner shelf or a large built-in unit, you have complete control over the final product.
Sense of Accomplishment and Personal Touch
There’s something incredibly satisfying about creating something with your own hands. Building your own bookshelves gives you a sense of accomplishment and allows you to add a personal touch to your home decor.
Eco-Friendly by Using Recycled or Reclaimed Materials
DIY projects offer the opportunity to be eco-friendly by using recycled or reclaimed materials. This not only helps the environment but also adds unique character to your bookshelves.
Materials and Tools Needed for DIY Bookshelves
Before you start building your DIY bookshelves, it’s essential to gather all the necessary materials and tools. Here’s a list to get you started:
Types of Wood and Alternatives
- Solid Wood: Durable and offers a classic look. Options include oak, pine, and maple.
- Plywood: More affordable and versatile. Can be painted or stained.
- MDF (Medium-Density Fiberboard): Smooth surface ideal for painting, but less durable than solid wood.
- Reclaimed Wood: Eco-friendly and adds character.
Essential Tools
- Saw: Circular saw or miter saw for cutting wood.
- Drill: For making holes and driving screws.
- Screws and Brackets: To assemble and secure the shelves.
- Measuring Tape: For accurate measurements.
- Level: To ensure your shelves are even.
Optional Materials
- Paint or Stain: To finish your bookshelves.
- Decorative Elements: Trim, molding, or brackets for added style.
Where to Find Affordable Materials and Tools
- Hardware Stores: Look for sales and discounts.
- Online Retailers: Websites like Amazon often have competitive prices.
- Thrift Stores: Great for finding unique materials and tools.
Step-by-Step Guide to Building DIY Bookshelves
Now that you have your materials and tools ready, let’s dive into the step-by-step process of building your own DIY bookshelves.
Measuring and Planning Your Bookshelf
- Determine the Size: Measure the space where you plan to place your bookshelf. Decide on the height, width, and depth.
- Sketch a Plan: Draw a rough sketch of your bookshelf, including the number of shelves and their spacing.
Cutting and Preparing the Wood
- Measure the Wood: Use your measuring tape to mark the dimensions on your wood.
- Cut the Wood: Use a saw to cut the wood to the required lengths.
- Sand the Edges: Smooth the edges of the cut wood to prevent splinters.
Assembling the Frame and Shelves
- Assemble the Frame: Attach the sides, top, and bottom pieces using screws and brackets.
- Install the Shelves: Secure the shelves to the frame at your desired spacing. Use a level to ensure they are even.
Securing the Bookshelf to the Wall
- Locate Studs: Use a stud finder to locate the studs in your wall.
- Secure with Brackets: Attach brackets to the top of the bookshelf and secure them to the studs in the wall. This adds stability and prevents tipping.
Finishing Touches: Painting, Staining, and Decorating
- Paint or Stain: Apply paint or stain to your bookshelf to match your decor. Let it dry completely.
- Add Decorative Elements: Attach any trim, molding, or other decorative elements to enhance the look of your bookshelf.
Creative DIY Bookshelf Ideas
Looking for inspiration? Here are some creative DIY bookshelf ideas to consider for your next project:
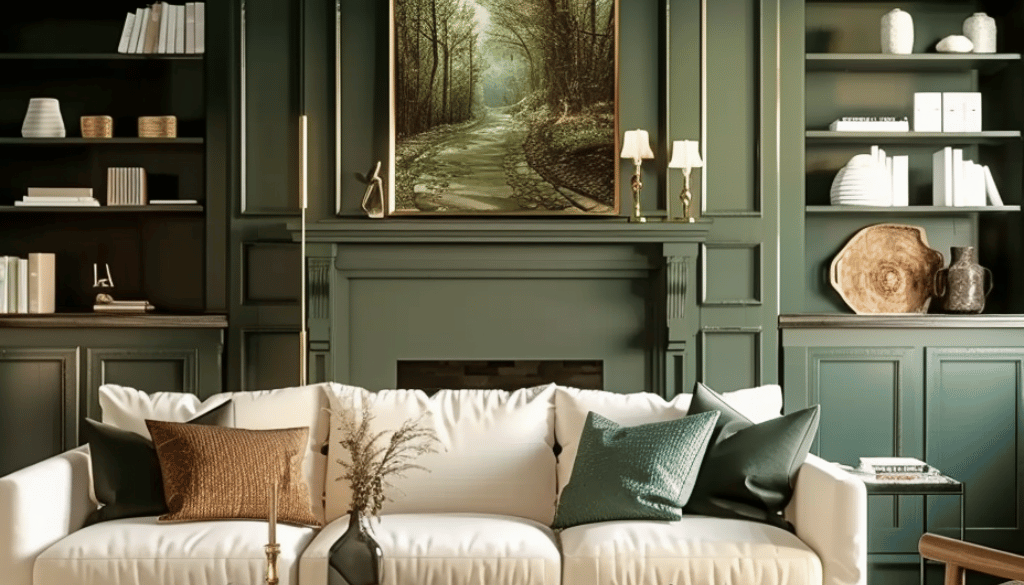
Floating Bookshelves for a Modern Look
- Minimalist Design: Floating bookshelves create a sleek and modern look by appearing to “float” on the wall.
- Space-Saving: Ideal for small spaces as they don’t take up floor space.
Ladder Bookshelves for a Rustic Touch
- Unique Style: Ladder bookshelves add a rustic and charming touch to any room.
- Versatile: Can be leaned against a wall or mounted for extra stability.
Built-In Bookshelves for Maximizing Space
- Custom Fit: Built-in bookshelves can be tailored to fit perfectly into any nook or wall space.
- Integrated Look: Creates a seamless and integrated look in your home.
Corner Bookshelves for Small Spaces
- Utilize Corners: Make use of corner spaces that are often overlooked.
- Compact and Functional: Provides storage without taking up much space.
Themed Bookshelves for Kids’ Rooms
- Fun Designs: Create bookshelves in fun shapes or themes, like castles or trees, to make reading more enjoyable for kids.
- Colorful and Creative: Use bright colors and playful designs to match the room’s decor.
Tips for Customizing Your DIY Bookshelves
Personalizing your DIY bookshelves can make them truly unique. Here are some tips for customizing your project:
Adding Decorative Molding or Trim
- Elegant Touch: Adding molding or trim can give your bookshelves a more polished and elegant look.
- Easy to Install: Use wood glue or small nails to attach the trim.
Incorporating Lighting for a Stylish Effect
- LED Lights: Install LED strip lights under each shelf for a modern and stylish effect.
- Task Lighting: Add small lamps or spotlights to highlight your book collection.
Using Unique Brackets or Supports
- Decorative Brackets: Choose brackets in unique shapes or finishes to add character.
- Hidden Supports: For a sleek look, use hidden supports for floating shelves.
Painting or Staining Techniques for a Custom Finish
- Distressed Finish: Create a vintage look by sanding the edges after painting.
- Two-Tone: Paint the frame one color and the shelves another for a bold contrast.
Personalizing with Decorative Accents and Accessories
- Bookends: Use decorative bookends to add personality.
- Plants and Decor: Mix books with small plants and decor items for a visually appealing display.
Maintenance and Care for DIY Bookshelves
To keep your DIY bookshelves looking their best, follow these maintenance and care tips:
Regular Cleaning and Dusting Tips
- Dust Weekly: Use a microfiber cloth to dust your shelves regularly.
- Avoid Water: Don’t use water or cleaning sprays that can damage the wood.
How to Handle Spills and Stains
- Blot Immediately: If a spill occurs, blot it with a dry cloth immediately.
- Mild Cleaners: Use a mild soap solution for cleaning stains, but avoid soaking the wood.
Tips for Preventing and Repairing Damage
- Avoid Overloading: Don’t overload the shelves with heavy items to prevent sagging.
- Repair Scratches: Use wood filler and touch-up paint or stain to repair scratches.
Seasonal Maintenance Tips
- Check Stability: Periodically check that the bookshelf is still securely attached to the wall.
- Reapply Finish: Depending on wear, you might need to reapply paint or stain every few years.
Eco-Friendly DIY Bookshelf Projects
Consider these eco-friendly ideas for your DIY bookshelf project:
Using Reclaimed Wood and Materials
- Sustainable Choice: Reclaimed wood is an eco-friendly option that reduces waste.
- Unique Character: Each piece of reclaimed wood has its own history and character.
Repurposing Old Furniture into Bookshelves
- Upcycling: Convert old furniture like dressers or tables into functional bookshelves.
- Cost-Effective: Save money by repurposing items you already have.
Sustainable Finishing Options
- Non-Toxic Paints: Use non-toxic, low-VOC paints and stains.
- Natural Finishes: Consider natural oils or waxes for finishing the wood.
Eco-Friendly Tools and Supplies
- Electric Tools: Use electric tools to reduce the use of fossil fuels.
- Recycled Materials: Choose tools and supplies made from recycled materials whenever possible.
Conclusion
Incorporating DIY Bookshelves into your home is one of the most rewarding, functional, and visually transformative projects you can take on in 2024. These stylish and practical storage solutions go beyond mere utility—they express your creativity, enhance the atmosphere of any room, and reflect your personal design taste. Whether you live in a small apartment or a spacious home, DIY Bookshelves offer limitless ways to add character, charm, and order to your living space.
The true beauty of DIY Bookshelves lies in their versatility. From rustic farmhouse styles to sleek modern designs, there’s a bookshelf idea out there to match any aesthetic. You can build floor-to-ceiling DIY Bookshelves to create a dramatic library effect or install compact floating shelves for a minimalist feel. With endless materials and configurations to choose from—wood, metal, pipe fittings, crates, or repurposed furniture—DIY Bookshelves can be tailored to fit your specific needs and budget. You’re not just buying a standard piece of furniture; you’re crafting a personalized design that serves a purpose and tells a story.
One of the most appealing aspects of DIY Bookshelves is the freedom to build them to your exact specifications. Unlike store-bought units, DIY Bookshelves are customizable down to the last inch. Have a tricky nook or awkward corner that standard shelves won’t fit? With DIY Bookshelves, you can measure and build a solution that fits perfectly. Need more height, depth, or unique angles? DIY Bookshelves make it possible. This adaptability makes them an ideal choice for renters, homeowners, and anyone with a specific vision for their space.
Functionally, DIY Bookshelves serve as far more than book storage. You can style them with baskets, decorative accents, indoor plants, framed photos, and seasonal décor. They become focal points, conversation starters, and even artistic statements in a room. Because DIY Bookshelves are handcrafted, they often feel more intentional and personal than mass-produced alternatives. This intentionality adds warmth and texture to your home, making it feel curated and lived-in.
For families, DIY Bookshelves can also become meaningful projects—something you build together. They offer a chance to teach kids about basic carpentry, involve teens in room makeovers, or simply enjoy the satisfaction of creating something beautiful with your hands. The process of designing and constructing DIY Bookshelves from scratch, or even modifying an existing piece, fosters creativity, problem-solving, and pride. You can turn a weekend project into a lasting memory—and a lasting addition to your décor.
Sustainability is another compelling reason to choose DIY Bookshelves. Building your own shelves allows you to repurpose materials, reduce waste, and avoid the carbon footprint of mass production and shipping. Old wooden doors, pallets, ladders, and crates can all be upcycled into unique DIY Bookshelves with a little sanding, staining, and creativity. Choosing eco-conscious materials and minimizing unnecessary waste not only saves money—it also contributes positively to the environment.
The cost savings associated with DIY Bookshelves is another major benefit. While high-end custom shelving can be expensive, DIY Bookshelves allow you to achieve a luxurious or bespoke look for a fraction of the price. You control the budget, select your materials, and determine how simple or elaborate you want the design to be. For homeowners looking to increase the value of their space or simply elevate their interior design without overspending, DIY Bookshelves are a smart investment.
Design trends in 2024 continue to highlight personalization and functionality—making DIY Bookshelves more relevant than ever. Built-in shelves, asymmetrical layouts, and mixed-material styles are growing in popularity. Painted backs, integrated lighting, and even wallpaper-lined shelves can turn ordinary DIY Bookshelves into extraordinary features. Don’t be afraid to experiment with color, texture, and shape when designing your shelves. The best DIY Bookshelves are the ones that blend seamlessly with your space while adding a touch of uniqueness.
And don’t worry if you’re not an experienced builder—DIY Bookshelves don’t have to be complicated. There are countless tutorials, blueprints, and video guides available online for every skill level. Whether you’re using basic tools like a hammer and screwdriver or more advanced equipment like a miter saw and drill press, there’s a project out there suited to your capabilities. Even pre-assembled kits or flat-pack options can be customized to create the look and functionality of DIY Bookshelves without requiring expert skills.
If you love to decorate seasonally or refresh your space frequently, DIY Bookshelves can also serve as rotating displays. In the spring, fill them with florals, light reads, and fresh tones. In autumn, style them with cozy textures, pumpkins, and warm lighting. This flexibility in both form and function keeps your home feeling current and dynamic. You’re not just building shelves; you’re creating a design element that evolves with your lifestyle.
As remote work and hybrid schedules become more common, DIY Bookshelves are also becoming essential elements of home offices. A well-styled shelf behind a desk adds professionalism to video calls and makes working from home more enjoyable. DIY Bookshelves offer practical storage for office supplies, books, and reference materials while contributing to a workspace that inspires productivity.
For those who entertain frequently, DIY Bookshelves in dining areas or living rooms can double as cocktail stations, display areas for glassware, or feature walls for conversation pieces. Their multi-purpose nature ensures that they remain relevant and useful regardless of how your lifestyle changes.
In a world that increasingly values authenticity, craftsmanship, and intentional living, DIY Bookshelves represent more than just furniture. They are a reflection of your vision, effort, and creativity. They tell a story—not just of what’s displayed on the shelves, but of the journey it took to build them.
To summarize, DIY Bookshelves are the perfect blend of beauty, practicality, and personalization. They can elevate any room, adapt to any style, and serve multiple functions in your home. Whether you’re a seasoned DIYer or just starting out, there is always a DIY Bookshelves idea you can try, modify, and make your own. In 2024 and beyond, let your shelves reflect more than just your book collection—let them showcase your passion, your talent, and your home’s unique spirit.
So, don’t wait. Dive into the world of DIY Bookshelves and unlock the potential to redefine your space. Experiment with layouts, textures, colors, and materials. Explore creative arrangements, repurpose unexpected items, and let inspiration lead the way. Whether you’re building your first set of DIY Bookshelves or your tenth, each project brings a fresh opportunity to enhance your home and leave a lasting impression.
DIY Bookshelves aren’t just a trend—they’re a lifestyle. Start your next project today and experience the magic of transforming an empty wall into a masterpiece.
Check out some other articles you might like.
DIY Bookends: Creative Ideas to Organize Your Books in 2024


DIY Floating Shelves for Your Laundry Room: Step-by-Step
August 13, 2024 @ 1:33 am
[…] DIY Bookshelves: Creative and Budget-Friendly Ideas for 2024 […]