Best Kitchen Journey from Peel-and-Stick to Ceramic Tiles
When I first moved into my starter home, I was all about quick fixes and budget-friendly solutions. The kitchen, while functional, needed some serious updating. That’s when I discovered peel-and-stick backsplash tiles – they seemed like the perfect solution for a DIY enthusiast on a budget. Fast forward two years, and I decided it was time for an upgrade to ceramic tiles. Here’s my complete journey, along with everything I learned about transforming a kitchen backsplash from temporary to permanent.


Why I Initially Chose Peel-and-Stick Tiles
Let’s be honest – we’ve all been there. You want to refresh your space without breaking the bank or committing to a major renovation. When I first discovered peel-and-stick tiles at my local home improvement store, I thought I’d struck gold. They were affordable, easy to install, and looked surprisingly good from a distance. Plus, I could install them in a single weekend without any special tools or expertise.
The initial installation cost me less than $200 and took just six hours. I chose a classic white subway tile pattern, thinking it would be timeless enough to last until I was ready for something more permanent. While they served their purpose admirably, I began noticing some issues after about a year of use.

The Reality of Living with Peel-and-Stick Backsplash
While my peel-and-stick backsplash looked great initially, time revealed some limitations I hadn’t anticipated. The edges started peeling slightly in areas near the sink where moisture was common. In spots where oil had splattered during cooking, the tiles became slightly discolored and proved challenging to clean thoroughly.
Don’t get me wrong – these tiles aren’t all bad. They’re perfect for renters or homeowners who need a temporary solution. But after experiencing both options, I can definitively say that ceramic tiles offer significant advantages for long-term durability and maintenance.

Planning the Ceramic Tile Upgrade
Once I decided to make the switch to ceramic tiles, I spent several weeks planning the project. Here’s what my preparation process looked like:
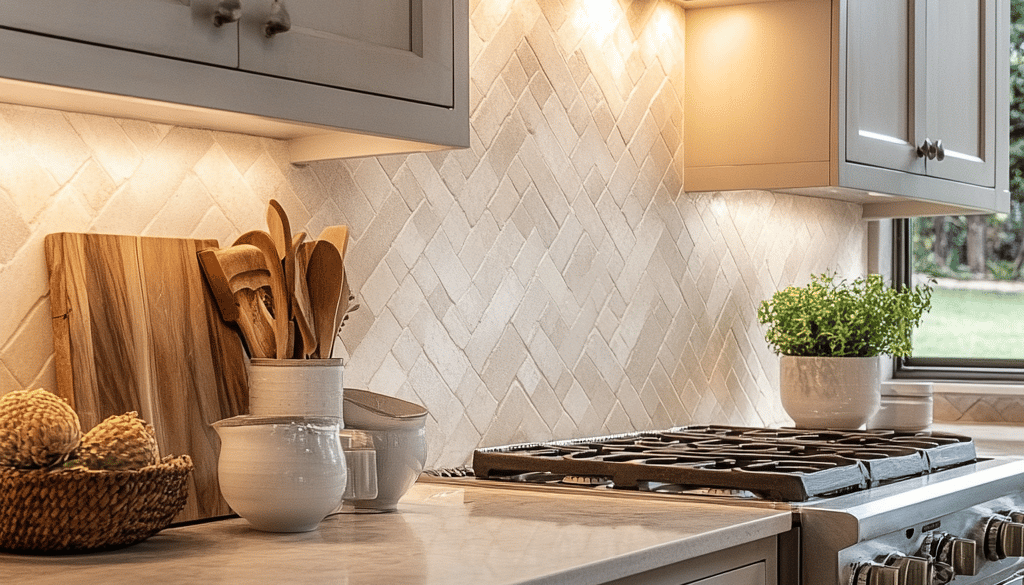
First, I researched different tile styles and materials. I ultimately chose a handcrafted ceramic subway tile with slight variations in color and texture, giving it a more artisanal look than my previous flat peel-and-stick version. The cost was higher – about $600 for the tiles alone – but the quality difference was immediately apparent.
I also invested in proper tools and materials:
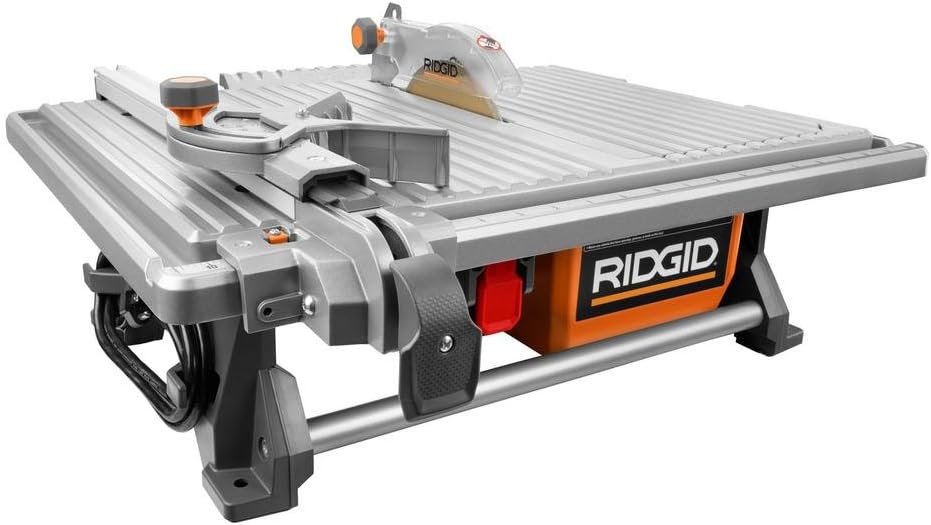
- Tile cutter
- Tile spacers
- Thinset mortar
- Grout
- Grout float
- Level
- Notched trowel
- Tile nippers for cutting around outlets
The total investment in tools and materials came to around $200, but I viewed it as an investment in both this project and future tile work.

Removing the Peel-and-Stick Tiles
This was the part I dreaded most, but it turned out to be easier than expected. Using a heat gun on low setting (borrowed from a friend), I slowly worked my way across the wall, heating each tile just enough to soften the adhesive. Most tiles came off cleanly, though some left residue that needed to be scraped away with a putty knife.
Pro tip: If you’re planning to remove peel-and-stick tiles, warm them up with a hair dryer if you don’t have access to a heat gun. It takes longer but works just as well.

Preparing the Wall Surface
The wall preparation proved to be crucial for a successful ceramic tile installation. After removing all adhesive residue, I:
- Patched any damaged drywall areas
- Sanded the entire surface until smooth
- Wiped down the walls with a damp cloth to remove dust
- Let the surface dry completely for 24 hours
This step took an entire weekend, but proper wall preparation is essential for ensuring your ceramic tiles adhere correctly and stay put for years to come.

Installing the Ceramic Tiles
The actual installation process was more time-consuming than difficult. I started by drawing level lines on the wall and planning my tile layout to minimize awkward cuts around outlets and edges. Working in small sections, I applied thinset mortar to the wall using my notched trowel, then carefully placed each tile with spacers to ensure even gaps.
I learned quickly that the key to professional-looking results is patience. Rather than rushing to finish, I took breaks between sections to ensure everything remained level and properly spaced. The entire tiling process took two full days, but the results were worth every minute.

Grouting and Finishing
After letting the tiles set for 24 hours, it was time for grouting. I chose a light gray grout that complemented the tiles while being dark enough to hide potential stains. The grouting process itself took about four hours, followed by several rounds of cleaning the tiles to remove haze.
One mistake I made was not buying enough grout initially – always get more than you think you need! A second trip to the store in the middle of grouting isn’t fun.

Cost Comparison and Long-Term Value
Let’s break down the costs:
Peel-and-Stick Solution:
- Tiles: $350
- Basic tools: $20
- Total: $370
Ceramic Tile Installation:
- Tiles: $600
- Tools and materials: $300
- Total: $900
While the ceramic tile project cost significantly more, the durability and increased home value make it a worthwhile investment. Plus, I won’t need to replace or repair these tiles anytime soon, unlike the peel-and-stick version that started showing wear after just one year.

Maintenance Differences
The difference in maintenance between peel-and-stick and ceramic tiles is dramatic. My peel-and-stick backsplash required gentle cleaning to avoid lifting edges, and certain cleaning products could damage the printed surface. With ceramic tiles, I can use any cleaning product I want, scrub when necessary, and never worry about peeling or water damage.
Design Impact and Home Value
The ceramic tile backsplash has transformed my kitchen’s entire appearance. The depth and texture of real tiles create shadows and highlights that flat peel-and-stick versions simply can’t match. While I liked my peel-and-stick backsplash well enough, the ceramic tiles have elevated the entire room’s aesthetic.
From a real estate perspective, ceramic tiles add genuine value to a home. When I had a realtor friend over recently, she estimated that the new backsplash alone could help command a higher price if I ever decide to sell.

Lessons Learned and Tips for Others
If you’re considering a similar upgrade, here are my key takeaways:
- Peel-and-stick tiles are great temporary solutions, especially for renters or those saving for a permanent upgrade. They’re particularly useful in low-moisture areas.
- The success of a ceramic tile installation depends largely on preparation. Don’t rush the wall prep stage, as it forms the foundation for everything else.
- Invest in quality tools if you plan to do more tile work in the future. If not, consider borrowing or renting specialized tools to save money.
- Always buy about 10% more tiles and grout than you calculate you’ll need. This accounts for cuts, breaks, and mistakes.
- Take your time with the installation. Rushing leads to mistakes that you’ll notice every time you look at your backsplash.

Final Thoughts
Looking back, I don’t regret starting with peel-and-stick tiles. They gave me time to save for the ceramic upgrade while improving my kitchen’s appearance in the meantime. However, the transformation to ceramic tiles has been more than worth the investment in both time and money.
If you’re on the fence about making the switch, consider your long-term plans for the space. If you own your home and plan to stay for a while, ceramic tiles offer durability and timeless appeal that peel-and-stick options simply can’t match. The project might seem daunting, but with proper planning and patience, it’s completely manageable for a dedicated DIYer.
Remember, your kitchen is one of the most used rooms in your home. Investing in quality materials not only improves your daily experience but also adds lasting value to your property. Whether you choose to start with peel-and-stick tiles or dive straight into ceramic, the key is making informed decisions that align with your budget, skills, and long-term goals.
Have you made the switch from peel-and-stick to ceramic tiles? I’d love to hear about your experience in the comments below!
If you love home decor and interior design as much as I do, check out these other articles I think you might like.
Modern Farmhouse Kitchen Elements on a Budget


