DIY Faux Marble Tray: Create Luxury Decor on a Budget
Introduction
Ready to add a touch of elegance to your home without breaking the bank? You’re in for a treat! Did you know that marble has been a symbol of luxury for over 2,000 years? But here’s the kicker – you don’t need to spend a fortune to get that coveted marble look. With our DIY faux marble tray project, you’ll be crafting a stunning piece that’ll have your friends asking, “Where did you buy that?” Let’s dive into the world of faux finishing and create a masterpiece that’s uniquely yours. Trust me, your coffee table is about to get a serious upgrade!
Materials Needed for Your DIY Faux Marble Tray
Before we start creating your faux marble tray, let’s gather all the necessary materials. Here’s a list of what you’ll need, including budget-friendly alternatives and tips on where to find the best deals:
Essential Materials
- Tray Base: You can use any tray you have at home or find a plain wooden tray at a craft store.
- White Primer: This will be your base coat, ensuring the paint adheres well.
- Acrylic Paints: Choose white, gray, and black for a classic marble look.
- Fine-Tip Brushes: For creating detailed marble veins.
- Soft Bristle Brushes: For blending and adding depth.
- Painter’s Tape: To protect the edges of your tray.
- Paper Towels: For blotting and cleaning brushes.
- Sealer: A clear acrylic sealer will protect your finished work.
Budget-Friendly Alternatives
- Tray Base: Check out thrift stores or dollar stores for inexpensive options.
- Acrylic Paints: Look for student-grade paints which are cheaper but still effective.
- Brushes: A multipack of brushes can save money compared to buying individually.
Where to Find the Best Deals
- Craft Stores: Use coupons and look for sales.
- Online Retailers: Websites like Amazon often have competitive prices.
- Discount Stores: Stores like Walmart or Target can have surprisingly good deals on craft supplies.
Optional Materials for Customization
- Gold Leaf: For adding a touch of luxury.
- Different Colored Paints: To create unique marble effects.
- Stencils: For adding monograms or patterns.
Step-by-Step Guide to Creating Your Faux Marble Tray
Now that you have all your materials, let’s get started with the creation process. Follow these steps to achieve a stunning faux marble finish:
Preparing Your Workspace and Materials
- Set Up Your Workspace: Cover your working area with newspapers or a drop cloth to protect surfaces.
- Gather Your Materials: Ensure everything you need is within reach.
- Tape the Edges: Use painter’s tape to cover the edges of the tray if you want to keep them clean from paint.
Applying the Base Coat
- Prime the Tray: Apply a coat of white primer to the tray and let it dry completely.
- Apply White Acrylic Paint: Once the primer is dry, paint the entire surface with white acrylic paint as your base color. Let it dry.
Techniques for Creating Marble Veining
- Mix Your Gray Paint: Dilute gray acrylic paint with a bit of water to make it easier to work with.
- Create Veins: Use a fine-tip brush to paint thin, random lines across the tray. These will be your marble veins.
- Blend the Veins: Immediately after painting the veins, use a soft bristle brush or a slightly damp paper towel to gently blur the lines, giving them a natural look.
Adding Depth and Dimension to Your Faux Marble
- Layering: Repeat the veining process with different shades of gray and black to add depth.
- Blotting: Use a paper towel to blot the veins lightly, adding texture and dimension.
- Highlights: Add touches of white to certain areas to mimic natural highlights in marble.
Sealing and Protecting Your Finished Tray
- Let It Dry: Allow your tray to dry completely overnight.
- Apply Sealer: Once dry, apply a clear acrylic sealer to protect your faux marble finish. Follow the instructions on the sealer for best results.
Tips and Tricks for Achieving Realistic Marble Effects
Creating a realistic marble effect takes a bit of practice and a few insider tips. Here are some expert tricks to help you achieve the perfect look:
Color Selection for Different Types of Marble
- Carrara Marble: Use light grays and whites.
- Calacatta Marble: Incorporate more stark white and less veining.
- Emperador Marble: Use browns and darker colors for a richer look.
Brush Techniques for Natural-Looking Veins
- Randomness is Key: Natural marble has irregular veins. Avoid patterns.
- Layering: Build up layers of veins for a more complex look.
- Feathering: Use light, feathery strokes to blend veins seamlessly.
Common Mistakes to Avoid
- Overworking the Paint: Too much blending can make the veins disappear.
- Using Too Much Water: This can dilute the paint and make it runny.
- Not Sealing: Skipping the sealer can lead to damage over time.
How to Fix Errors in Your Faux Marble Finish
- Too Dark Veins: Lightly sand the area and repaint.
- Smudges: Dab with a damp paper towel to lift excess paint.
- Unblended Areas: Use a dry brush to blend any harsh lines.
Customizing Your Faux Marble Tray
Personalization is what makes your DIY project truly unique. Here are some ideas to customize your faux marble tray:
Adding Gold Leaf Accents
- Apply Adhesive: Use a brush to apply gold leaf adhesive to the areas you want to highlight.
- Lay the Gold Leaf: Carefully place the gold leaf onto the adhesive and press gently.
- Seal: Apply a sealer over the gold leaf to protect it.
Incorporating Different Marble Colors
- Mixing Colors: Use different shades to create a multi-tonal marble effect.
- Accent Colors: Add a pop of color like blue or green for a unique twist.
Creating Unique Shapes and Sizes
- Custom Trays: Use different tray shapes like round or hexagonal for variety.
- Sizes: Create small trays for jewelry or large ones for serving.
Personalizing Your Tray with Monograms or Patterns
- Stencils: Use stencils to add monograms or intricate patterns.
- Freehand: If you’re confident, freehand your designs for a personal touch.
Caring for Your DIY Faux Marble Tray
To keep your faux marble tray looking luxurious, proper care is essential. Here are some tips:
Cleaning and Maintenance Tips
- Wipe Clean: Use a damp cloth to clean the tray regularly.
- Avoid Harsh Cleaners: Stick to mild soap and water to prevent damage.
How to Prevent Damage to Your Faux Finish
- Coasters: Use coasters for drinks to avoid stains.
- Avoid Heat: Keep hot items off the tray to prevent warping or damage.
Touching Up Wear and Tear
- Repaint: Touch up any areas where the paint has chipped or worn away.
- Re-seal: Apply a new coat of sealer every few years to maintain the finish.
When to Consider Refinishing
- Major Damage: If your tray is significantly damaged, consider refinishing it entirely.
- Change of Style: Refinish if you want to update the look or color.
If Painting is Not Your Thing
Another great way to achieve the marble look for less is using peel and stick wallpaper. You can choose from many different looks and finishes without breaking the bank.
Creative Uses for Your Faux Marble Tray
A faux marble tray is not just for show. It can be functional and versatile. Here are some creative ways to use your tray:
Styling Ideas for Different Rooms
- Living Room: Use it as a coffee table centerpiece.
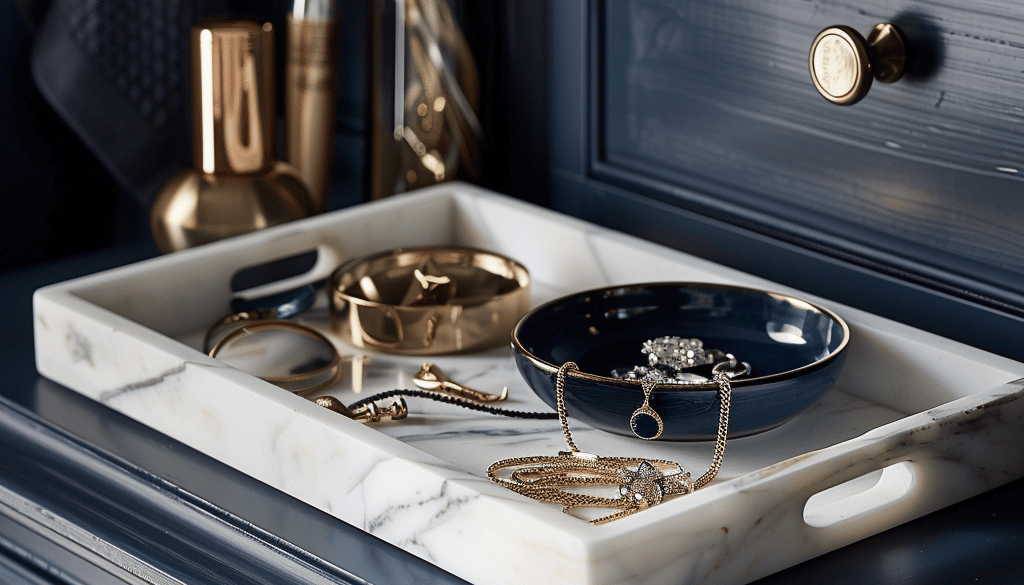
- Bedroom: Place it on your dresser for perfumes and accessories.
- Bathroom: Use it to organize toiletries and towels.
Functional Applications
- Vanity Organizer: Perfect for holding makeup and beauty products.
- Serving Tray: Impress guests by serving drinks and snacks.
- Desk Organizer: Keep office supplies tidy and stylish.
Gift-Giving Suggestions
- Personalized Gift: Add a monogram and give it as a housewarming present.
- Holiday Gift: Customize with festive colors for a unique holiday gift.
- Bridal Shower: A luxurious and thoughtful gift for brides-to-be.
Incorporating Your Tray into Various Decor Styles
- Modern: Keep it sleek with minimal veining and clean lines.
- Vintage: Add some distressed details for a shabby chic look.
- Glam: Incorporate gold accents for a touch of luxury.
Conclusion
Creating a marble tray may seem like a high-end design move reserved for luxury homes, but with a little creativity, resourcefulness, and your own personal flair, it becomes an accessible and stylish decor project anyone can tackle. The beauty of a DIY marble tray lies not only in its sleek aesthetic but in its versatility. Whether you’re looking to add sophistication to your vanity, a polished touch to your coffee table, or a functional yet stylish centerpiece for your kitchen, a marble tray can transform any space without breaking the bank.
What makes this project so rewarding is how something as simple as adhesive marble contact paper and a dollar-store tray can evolve into a statement piece that rivals designer versions. The finished marble tray looks high-end, yet the process to create it is delightfully simple and affordable. For homeowners and renters alike, this is one of the most budget-conscious ways to enjoy the timeless elegance of marble.
Let’s take a moment to appreciate what a marble tray brings to a space. It’s not just decor—it’s a design tool. A marble tray allows you to contain and curate your space. Place it on a console table to gather candles, a vase of fresh blooms, and a small sculpture. Use it in the bathroom to corral skincare essentials, perfume bottles, or a jar of bath salts. Set it on your dresser for your everyday jewelry and favorite lipsticks. The possibilities are endless, and that’s what makes a marble tray so magical.
Beyond its decorative function, a marble tray brings cohesion and balance to a room. It draws the eye, adds visual weight, and introduces a clean, crisp texture that blends seamlessly with most interior styles—from minimalist and modern to farmhouse chic or Hollywood glam. When done with intention and detail, a DIY marble tray can easily become a signature item in your home’s aesthetic.
What’s more, this project is incredibly adaptable. Don’t feel restricted by traditional shapes or materials. Think outside the box: rectangular trays for a structured, clean look, round marble trays for softer, more organic flow. Choose gold handles for a touch of glamour or matte black ones for a modern, moody vibe. A faux marble tray can be elevated further with mirrored bases, wooden accents, or even acrylic elements. With every tweak and detail, you bring more personality to your marble tray—and that’s what truly sets your DIY apart.
Let’s talk styling, because once you’ve crafted your marble tray, it becomes a blank canvas for beautiful vignettes. One approach is the rule of threes—grouping items in odd numbers creates balance and interest. Think: a small candle, a decorative book, and a mini sculpture. Or a plant, a ceramic dish, and a framed photo. Your marble tray can reflect the seasons too—swap out florals, candles, or colors to keep your space fresh and seasonally inspired.
Don’t underestimate how powerful this simple project can be when it comes to gifting. A handmade marble tray makes a thoughtful and personal gift for birthdays, housewarmings, or holidays. Wrap it with a satin ribbon, add a few curated items like a candle or hand cream, and you’ve created a personalized and luxurious gift set that feels far more expensive than it actually is.
The best part about your DIY marble tray? You control every element. There’s freedom to choose textures, colors, shapes, and styling that align with your personal aesthetic. The materials are budget-friendly, often under $10, and yet the finished look is convincingly luxe. For those craving that marble look but unwilling to splurge, a marble tray offers the perfect solution.
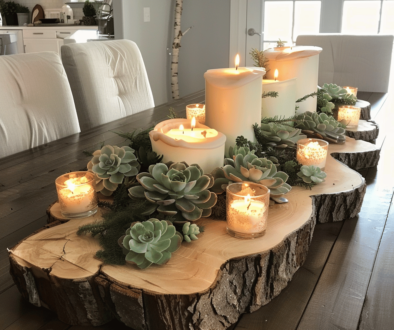
If you’re trying to maximize the impact of your marble tray, place it in an area that gets lots of visual attention. On the kitchen island, it can hold salt, pepper, and olive oil dispensers, instantly elevating utilitarian items. On a coffee table, your marble tray becomes a foundation for curated living, holding books, a succulent, and perhaps your favorite coasters. In the bathroom, a marble tray makes self-care feel like a spa ritual. Suddenly, your toothbrush and lotion aren’t just necessities—they’re design features.
When thinking long-term, your marble tray isn’t just a short-term trend. Marble—real or faux—has been a staple in elegant interiors for centuries. Its crisp white base with subtle veining exudes sophistication and minimalism, making it a timeless addition to your decor. By embracing the DIY version, you enjoy the same timeless charm without committing to costly materials or renovations.
Moreover, creating a marble tray is a fantastic entry point into the world of DIY home decor. It doesn’t require advanced skills or expensive tools—just your time, a little patience, and a vision. The satisfaction of transforming inexpensive materials into a chic, functional piece will likely inspire more projects around your home. And before long, you might find yourself creating matching coasters, placemats, or wall art to complement your original marble tray.
Another beautiful feature of a DIY marble tray is its portability. It can be moved from room to room depending on your needs or style refreshes. Hosting brunch? Use it as a serving piece. Need a spot to organize office supplies? Bring it to your desk. Redecorating the guest room? Let your marble tray anchor a bedside vignette. It truly is the small decor item that does it all.
We often underestimate the power of small changes in our living environment. But something as seemingly minor as adding a marble tray can shift the atmosphere in a room. It tells a story of intention, elegance, and creativity. It whispers luxury while staying rooted in simplicity. And best of all, it tells your story—because you made it, styled it, and made it your own.
So, if you’ve been looking for a sign to try your hand at crafting your own decor piece, let this be it. Gather your materials, set aside an afternoon, and make space at your dining table or workspace. Your marble tray awaits, ready to add beauty and function to your home. And when guests compliment it—and they will—you’ll have the added joy of saying, “Thanks, I made it myself.”
In closing, a marble tray may seem like a small detail in your decor, but it delivers a significant impact. It’s proof that luxury doesn’t have to be expensive, and style doesn’t need to come with a steep price tag. Whether you create one marble tray or a collection for every room, you’re investing in pieces that reflect elegance, practicality, and your personal design touch.
The next time you crave a decor upgrade, don’t rush to the store. Instead, channel your creativity into crafting a marble tray that not only beautifies your space but also offers function, personality, and timeless appeal. With minimal investment and a touch of DIY magic, your faux marble tray can rival any high-end home accessory.
For creative ways to style these trays, check out these articles.
The Ultimate Guide to Choosing Affordable Bathroom Accessories
Transform Your Bedroom into a Calming Luxury Retreat on a Budget
Transforming Your Entryway: Functional and Beautiful on a Budget


DIY Tufted Headboard: Create a Luxurious Bedroom on a Budget
September 22, 2024 @ 6:42 pm
[…] DIY Faux Marble Tray: Create Luxury Decor on a Budget […]