DIY Oversized Mirror: Create Stunning Home Decor on a Budget
Introduction
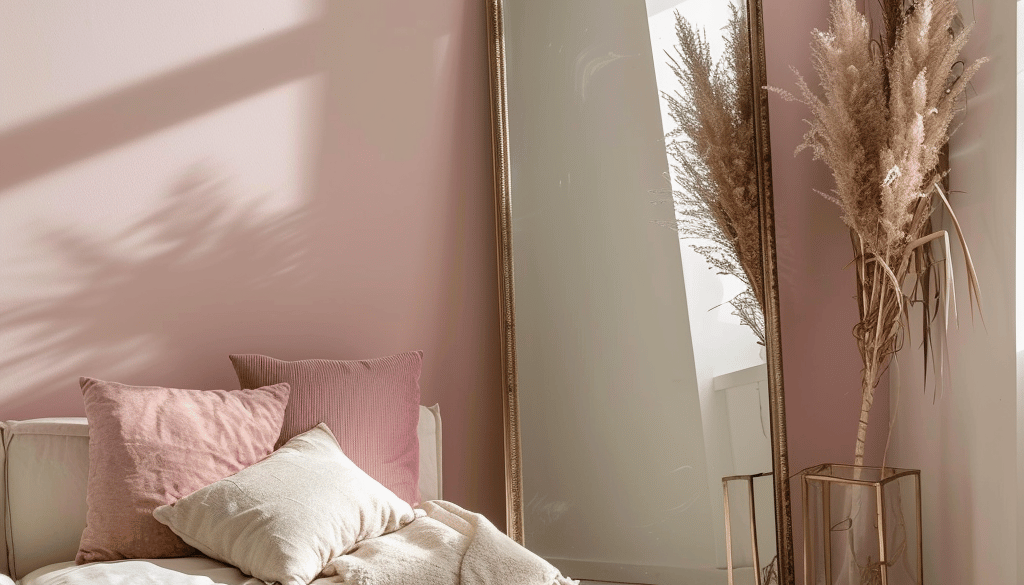
Want to add elegance and make your space look larger without breaking the bank? An oversized mirror can do just that! Mirrors are functional and a fantastic design element that can enhance any room. The best part? You can make one yourself! In this guide, we’ll show you how to create a DIY oversized mirror with budget-friendly materials and easy steps. Whether you’re a DIY novice or a seasoned pro, you’ll find inspiration and practical advice to transform your home decor. Let’s get started!
Benefits of a DIY Oversized Mirror
Creating a DIY oversized mirror has many benefits beyond aesthetics. Here are some great reasons to start this project:
Enhances Room Size
A DIY Oversized Mirror can make small spaces look larger by reflecting light and adding depth. It’s perfect for compact rooms or narrow hallways.
Adds Elegance
A DIY Oversized Mirror adds luxury and sophistication to any space. An oversized mirror can become a stylish focal point, elevating the overall look of your room.
Budget-Friendly
Buying a large, decorative mirror can be expensive. Making one yourself can save you money while still achieving a high-end look.
Customizable
One of the best things about DIY projects is customization. Choose the size, shape, frame, and finish that perfectly match your decor.
Reflects Light
Mirrors are great for brightening up dark rooms. By placing your DIY oversized mirror strategically, you can reflect natural light and make your space feel more open and airy.
Materials and Tools Needed for Your DIY Oversized Mirror
Before you start, gather all the necessary materials and tools. Here’s what you’ll need:
Mirror Panels
- Source: Hardware stores, online retailers, or second-hand shops.
- Size: Choose the size that fits your space. You might need to combine multiple panels for a truly oversized effect.
Frame Materials
- Wood: Versatile and easy to use. Opt for sturdy wood like pine, oak, or reclaimed wood for a rustic touch.
- Metal: For a sleek, modern look, consider metal frames.
- Repurposed Materials: Get creative with old window frames, doors, or other repurposed items.
Adhesives and Fasteners
- Glue: Mirror adhesive or strong construction adhesive.
- Nails and Screws: For securing the frame.
Tools
- Measuring Tape: Essential for accuracy.
- Saw: To cut the frame materials.
- Drill: For making holes and securing screws.
- Level: To ensure your mirror hangs straight.
Decorative Elements
- Paint or Stain: To finish the frame.
- Trim or Molding: For added detail.
Step-by-Step Guide to Making Your DIY Oversized Mirror
Ready to start? Follow these steps to create your stunning DIY oversized mirror:
Planning and Measuring
- Determine the Size: Decide where you want to place the mirror and measure the available space. Consider how big you want your mirror to be.
- Sketch a Plan: Draw a rough sketch of your mirror, including dimensions and any decorative elements you plan to add.
Selecting Materials
- Mirror Panels: Choose panels that fit your desired size. You may need to combine multiple panels for a larger mirror.
- Frame Materials: Select your frame material based on your preferred style—wood for a classic or rustic look, metal for modern, or repurposed items for a unique touch.
Cutting and Preparing the Frame
- Measure and Mark: Measure your frame pieces accurately and mark where to cut.
- Cut the Wood: Use a saw to cut the frame pieces to size. Sand the edges for a smooth finish.
Assembling the Frame
- Lay Out the Pieces: Arrange the frame pieces on the floor to ensure they fit together properly.
- Attach the Corners: Use wood glue and nails or screws to attach the corners securely.
- Reinforce Joints: For added stability, use metal corner brackets.
Mounting the Mirror Panels
- Apply Adhesive: Apply mirror adhesive to the back of the mirror panels.
- Attach to Frame: Carefully place the mirror panels onto the frame, pressing firmly to ensure a good bond.
- Secure with Clips: If needed, use mirror clips to hold the panels in place while the adhesive dries.
Finishing Touches
- Paint or Stain: Finish the frame with your chosen paint or stain. Allow it to dry completely.
- Add Trim or Molding: Attach any decorative trim or molding to enhance the look of your mirror.
Creative Ideas for Customizing Your DIY Oversized Mirror
Personalizing your DIY Oversized Mirror can make it truly unique. Here are some creative customization ideas:
Vintage Style
- Distressed Wood: Use sandpaper to distress the wood frame for a vintage look.
- Antique Finishes: Apply a dark stain or antique glaze to give the frame an aged appearance.
Modern Minimalist
- Sleek Metal Frames: Use metal for a clean, minimalist look.
- Clean Lines: Keep the design simple with straight, clean lines.
Rustic Charm
- Reclaimed Wood: Use reclaimed wood for a natural, rustic feel.
- Natural Textures: Highlight the wood grain with a clear finish.
Glamorous Touches
- Metallic Paints: Add a touch of glamour with metallic paints like gold or silver.
- Decorative Trim: Use ornate trim or molding to enhance the frame.
Unique Shapes
- Geometric Designs: Create a geometric frame for a modern, artistic look.
- Unconventional Shapes: Think outside the box with circular, oval, or irregularly shaped mirrors.
Tips for Safely Hanging and Securing Your DIY Oversized Mirror
Hanging a large mirror requires extra care to ensure it’s secure and safe. Follow these tips:
Choosing the Right Location
- Solid Wall: Ensure the wall is sturdy enough to support the weight of the mirror.
- Eye Level: Hang the mirror at eye level for the best visual impact.
- Reflect Light: Position the mirror to reflect natural light and brighten the room.
Wall Anchors and Supports
- Heavy-Duty Anchors: Use heavy-duty wall anchors or toggle bolts for added security.
- Studs: Secure the mirror into wall studs whenever possible for maximum support.
Balancing and Leveling
- Use a Level: Check that the mirror is perfectly level before securing it.
- Adjust as Needed: Make small adjustments to ensure the mirror hangs straight.
Safety Precautions
- Handle with Care: Large mirrors can be heavy and fragile. Handle with care to avoid breakage.
- Securely Fasten: Ensure all fasteners and supports are securely tightened.
Maintenance and Care for Your DIY Oversized Mirror
To keep your mirror looking its best, follow these maintenance tips:
Regular Cleaning
- Dust Regularly: Use a soft cloth or duster to remove dust.
- Clean the Glass: Use a glass cleaner and a microfiber cloth to clean the mirror surface.
Handling Scratches and Chips
- Repair Minor Damage: Use a glass repair kit to fix small scratches or chips.
- Protect the Surface: Avoid abrasive cleaners that can damage the glass or frame.
Protecting the Frame
- Reapply Finish: Periodically reapply paint or stain to keep the frame looking fresh.
- Avoid Moisture: Keep the mirror away from areas with high humidity to prevent damage to the frame.
Seasonal Maintenance
- Inspect Annually: Check the mirror and its supports at least once a year for signs of wear or damage.
- Adjust as Needed: Tighten any loose screws or brackets to ensure continued stability.
Conclusion
Creating your own DIY Oversized Mirror is more than just a fun weekend project—it’s a statement in creativity, a budget-friendly design choice, and a powerful way to personalize your space. Whether you live in a cozy apartment or a spacious home, mirrors have long been used to enhance light, expand visual space, and add elegance. But with the surge in popularity of oversized mirrors, especially in high-end interiors, the price tag can often be daunting. That’s what makes a DIY approach so appealing. By customizing materials, dimensions, and finishes, you can craft a piece that’s both cost-effective and completely unique to your home’s style.
Throughout this project, you’ve likely discovered just how achievable it is to make your own DIY Oversized Mirror, even without prior experience in woodworking or decor construction. One of the biggest benefits of this process is the control it gives you. From choosing the exact size that fits your space, to selecting a frame that complements your aesthetic—be it rustic, modern, farmhouse, or glam—every decision is yours. This level of customization is often impossible to find with store-bought options. And let’s not forget the satisfaction that comes from stepping back and admiring a beautiful piece that you created with your own hands.
For those looking to add an extra layer of luxury or impact to their living room, bedroom, hallway, or even bathroom, an oversized mirror instantly transforms the vibe. Mirrors amplify natural light, visually double the size of a room, and can become the stunning focal point that ties your decor together. The fact that you can achieve this effect with a DIY Oversized Mirror—using affordable materials and straightforward techniques—is proof that you don’t need to spend thousands to enjoy high-end style.
What also makes this project so exciting is its versatility. Your DIY mirror can be leaned casually against a wall for a chic, laid-back look, or mounted securely for a more traditional approach. Add LED backlighting for a modern twist or keep it simple with a clean wooden frame. The choice is yours. Want a vintage feel? Distress the wood. Prefer sleek and modern? Go with high-gloss paint or metallic accents. A DIY Oversized Mirror allows for endless creativity, and that’s part of the charm—it evolves with your vision.
There’s also something incredibly empowering about learning to use basic tools and materials. Even if you’ve never built anything before, this project is a great introduction to DIY home decor. You might start with just this mirror, but it could inspire you to take on new challenges—maybe a custom shelf, a coffee table, or even a headboard. The confidence gained from completing your DIY Oversized Mirror is invaluable. You’ve not only enhanced your space, but you’ve also expanded your skills.
Let’s also talk about value. Oversized mirrors from high-end retailers can easily cost hundreds, if not thousands of dollars. Yet, with a few thoughtful purchases and a bit of elbow grease, your custom version can be created for a fraction of the price. And since it’s made with intention and love, it often holds far more sentimental value than anything store-bought. Your guests won’t just see a mirror—they’ll see a piece of art, a conversation starter, and a reflection of your personal style.
Incorporating a DIY Oversized Mirror into your home doesn’t just impact aesthetics—it influences the way you experience your space. A well-placed mirror can make a dark hallway feel brighter, a cramped room feel more open, and a bland wall feel dynamic. It’s one of the most efficient ways to improve both function and form in your decor, and doing it yourself only amplifies the effect. The sense of pride and ownership you feel every time you pass by your mirror is irreplaceable.
As you wrap up this project, take a moment to reflect on the journey. From the initial planning and sourcing of materials to measuring, cutting, assembling, and finally mounting your masterpiece—it’s a process that showcases your creativity and determination. If you’ve documented your steps along the way, consider sharing your progress online or with friends. Your work might just inspire someone else to create their own DIY Oversized Mirror, sparking a wave of creativity beyond your own home.
In conclusion, the beauty of a DIY Oversized Mirror lies not just in its final form, but in the story behind it. It tells a tale of resourcefulness, vision, and personal flair. It’s a testament to the fact that luxury and style don’t have to come with a premium price tag—they can be handcrafted, piece by piece, by you. Whether you’ve undertaken this project to solve a practical design challenge or simply to bring a touch of elegance into your space, the end result is something truly special. Your mirror isn’t just a reflection of your room—it’s a reflection of your talent, taste, and passion for home decor.
I love home decor and DIY, check out these other articles I think you might like.
How to Plan a Bedroom Renovation: From Budget to Completion
Transform Your Bedroom into a Calming Luxury Retreat on a Budget


DIY Vase Makeovers: Transform Your Home Decor on a Budget
August 12, 2024 @ 11:57 pm
[…] DIY Oversized Mirror: Create Stunning Home Decor on a Budget […]