Best Way to Paint Kitchen Cabinets: A Beginner’s Guide
Are you tired of looking at those outdated kitchen cabinets? Maybe you’ve been dreaming of a kitchen makeover but don’t want to break the bank. Well, you’re in luck! Paint kitchen cabinets. It is a fantastic way to breathe new life into your space without emptying your wallet. In this beginner’s guide, we’ll walk you through the process of transforming your kitchen cabinets from drab to fab. So, roll up your sleeves, and let’s get started!
My paint recommendation would be Beyond Paint.
Why Paint Your Kitchen Cabinets?
Before we dive into the nitty-gritty, let’s talk about why painting your kitchen cabinets is such a great idea:
- Cost-effective: Compared to replacing your cabinets, painting is much more budget-friendly.
- Personalization: You can choose any color that suits your style and complements your kitchen.
- Quick transformation: With some effort, you can dramatically change your kitchen’s look in just a few days.
- Increased home value: A fresh, updated kitchen can boost your home’s resale value.
Now that you’re convinced, let’s gather our supplies and get to work!
What You’ll Need
Here’s a list of materials and tools you’ll need for this project:
- Screwdriver
- Sandpaper (120-grit and 220-grit)
- Tack cloth
- Painter’s tape
- Drop cloths
- Degreaser or TSP (trisodium phosphate)
- Wood filler (if needed)
- Primer
- Paint (latex or oil-based)
- Paint brushes and foam rollers
- Paint trays
- New hardware (optional)
Pro tip: Don’t skimp on quality when it comes to paint and brushes. High-quality materials will make your job easier and give you better results.
Step-by-Step Guide to Painting Your Kitchen Cabinets
1. Prep Your Workspace
First things first, let’s get your kitchen ready for its makeover:
- Remove everything from your cabinets and clear off your countertops.
- Cover your countertops, appliances, and floors with drop cloths.
- Set up a well-ventilated workspace for painting cabinet doors and drawers.
2. Remove Cabinet Doors, Drawers, and Hardware
Now, it’s time to disassemble:
- Use your screwdriver to remove all cabinet doors and drawers.
- Take off all hardware (handles, knobs, and hinges).
- Label each piece and its corresponding location to make reassembly a breeze.


3. Clean and Degrease
Before you start painting, you need to ensure your cabinets are squeaky clean:
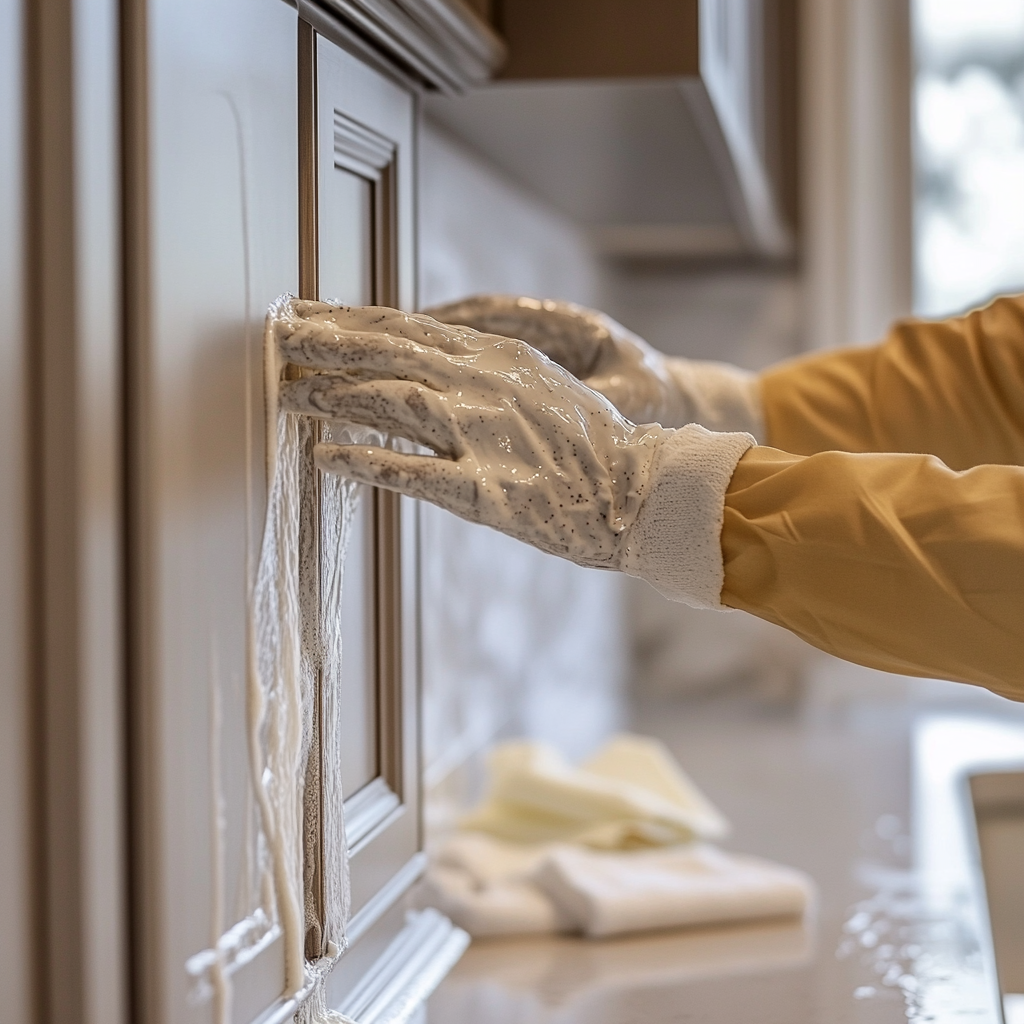
- Use a degreaser or TSP to remove any built-up grime, grease, or food particles.
- Wipe down all surfaces with a damp cloth and let them dry completely.
Remember, paint adheres best to clean, dry surfaces!
4. Repair and Sand
Now, let’s smooth things out:
- Fill any holes, dents, or scratches with wood filler.
- Once the filler is dry, sand all surfaces with 120-grit sandpaper.
- Wipe away the dust with a tack cloth.
- For extra smooth results, sand again with 220-grit sandpaper and wipe clean.
5. Prime Time
Priming is crucial for a long-lasting paint job:
- Apply a thin, even coat of primer to all surfaces.
- Let the primer dry completely (usually about 24 hours).
- Lightly sand the primed surfaces with 220-grit sandpaper.
- Wipe away any dust with a tack cloth.


6. Paint Your Heart Out
Now for the fun part – painting!
- Stir your paint thoroughly.
- Using a foam roller, apply a thin, even coat of paint to the cabinet boxes.
- Paint the cabinet doors and drawers using a combination of foam rollers (for flat surfaces) and brushes (for detail work).
- Let the first coat dry completely (usually 24 hours).
- Lightly sand with 220-grit sandpaper and wipe clean.
- Apply a second coat of paint.
Pro tip: For the smoothest finish, use long, steady strokes in the same direction as the wood grain.
7. Let It Dry
Patience is key here:
- Allow your newly painted cabinets to dry for at least 24 hours.
- For best results, wait 3-5 days before rehanging doors and replacing drawers.
8. Reassemble and Enjoy
The finish line is in sight:
- Reattach your cabinet doors and replace the drawers.
- Install your hardware (or new hardware if you’re going for a complete transformation).
- Stand back and admire your handiwork!
Tips for Success
To ensure your cabinet painting project goes off without a hitch, keep these tips in mind:
- Take your time: Rushing through the process can lead to messy results.
- Work in a dust-free environment: Dust can ruin an otherwise perfect paint job.
- Use foam rollers for a smooth finish: They leave fewer brush marks than traditional brushes.
- Consider using a paint sprayer: For a super smooth, professional-looking finish, a paint sprayer can be a game-changer.
- Don’t skip the prep work: Proper cleaning, sanding, and priming are essential for a durable paint job.
- Choose the right paint: Look for paint specifically designed for cabinets or trim.
Choosing the Right Color
Selecting the perfect color for your kitchen cabinets can be overwhelming. Here are some popular options to consider:
- White: Classic and timeless, white cabinets brighten up any kitchen.
- Gray: A trendy neutral that adds sophistication to your space.
- Navy: Bold and dramatic, navy cabinets create a striking look.
- Green: From sage to emerald, green cabinets bring a fresh, natural feel to your kitchen.
- Two-tone: Combine two colors for a unique and eye-catching design.
Remember to consider your kitchen’s lighting, countertops, and overall style when choosing a color.
Maintaining Your Newly Painted Cabinets
To keep your freshly painted cabinets looking their best:
- Wait at least two weeks before cleaning them to allow the paint to fully cure.
- Use a gentle, non-abrasive cleaner for regular maintenance.
- Avoid hanging damp towels or cloths on cabinet doors.
- Touch up any chips or scratches promptly to prevent further damage.
When to Call a Professional
While painting kitchen cabinets is a doable DIY project, there are times when it’s best to call in the pros:
- If your cabinets are in poor condition and need extensive repairs.
- If you’re dealing with lead-based paint (common in homes built before 1978).
- If you lack the time or patience for a multi-day project.
- If you want a factory-like finish that’s difficult to achieve with DIY methods.
Conclusion
Congratulations! You’re now equipped with all the knowledge you need to tackle your kitchen cabinet painting project. Remember, the key to success is patience and attention to detail. Take your time with each step, and you’ll be rewarded with beautiful, custom cabinets that will make your kitchen feel brand new.
So, what are you waiting for? Grab your supplies, put on your favorite playlist, and get ready to transform your kitchen. Happy painting!
Crazy about kitchens? Check out these other articles all about kitchens.


Upcycling Thrift Store Finds: Creative and Sustainable Ideas
September 20, 2024 @ 2:24 pm
[…] How to Paint Kitchen Cabinets: A Beginner’s Guide […]
Budget-Friendly Room Makeovers for the New Year
December 9, 2024 @ 1:50 pm
[…] How to Paint Kitchen Cabinets: A Beginner’s Guide […]
New Year, New Spaces: Your Complete Guide to Home Updates
December 28, 2024 @ 2:42 pm
[…] How to Paint Kitchen Cabinets: A Beginner’s Guide […]
Paint Colors That Make Your Laundry Room Less Boring
December 29, 2024 @ 2:50 pm
[…] How to Paint Kitchen Cabinets: A Beginner’s Guide […]