Best Laundry Room Makeover on a Budget: Space-Maximizing Tips
When I first moved into my 1950s starter home, the laundry room was more of a laundry closet – a cramped 6×8 space that made me dread wash day. Like many homeowners, I didn’t have thousands to spend on a full renovation. But after months of research, creative thinking, and some DIY determination, I transformed this tiny space into an organized, functional room that actually makes doing laundry enjoyable. Today, I’m sharing my budget-friendly makeover journey and practical tips to help you maximize your small laundry space without breaking the bank.
Below are some of products I love for home decorating and interior design.




Start with a Clean Slate
The first step in any makeover is clearing everything out. I removed everything from the laundry room and gave it a deep clean. This step cost nothing but time and elbow grease. It’s amazing how much larger a space feels when it’s completely empty. Plus, starting fresh helped me envision the possibilities rather than feeling stuck with the current layout.
During this process, I sorted through all the cleaning supplies, random socks, and miscellaneous items that had accumulated over time. I was shocked to discover how many half-empty detergent bottles and unused products were taking up valuable space. Pro tip: Use up what you have before buying new supplies, and only keep what you actually need in the laundry room.

Maximize Vertical Space with Budget-Friendly Storage Solutions
In a small laundry room, vertical space is your best friend. I installed several budget-friendly storage solutions that dramatically increased my storage capacity:
1. Over-the-Washer Shelving
I found an adjustable tension rod system at my local home improvement store for under $30. This created instant storage above my washer and dryer without any drilling into walls. I use it to hang freshly ironed clothes and store frequently used items like dryer sheets and stain removers.
2. Wall-Mounted Drying Rack
One of my favorite additions was a fold-down drying rack I mounted on the wall. When not in use, it folds flat against the wall, taking up virtually no space. I got mine on sale for $25, and it’s perfect for air-drying delicates or laying out sweaters to dry. This single addition has saved me countless trips to the dry cleaner.
3. DIY Shelving
Instead of buying expensive custom shelving, I created my own using basic wooden boards and brackets from the hardware store. The total cost was about $40, and it gave me three solid shelves for storage. I painted them white to match the room and created a custom look for a fraction of the price.

Smart Organization on a Shoestring Budget
Laundry room organization doesn’t have to be expensive. Some of my most effective solutions cost less than $10:
I repurposed clear glass jars from my kitchen to store powdered detergent and dryer balls. Not only do they look prettier than original packaging, but they also make it easy to see when supplies are running low. I added simple labels using a $5 label maker I already owned.
Dollar store bins and baskets became my best friends. I used them to create designated spaces for different items: one for cleaning supplies, another for lost socks, and a third for items that need special attention like stained clothes or minor repairs.
Paint and Lighting: Small Changes, Big Impact
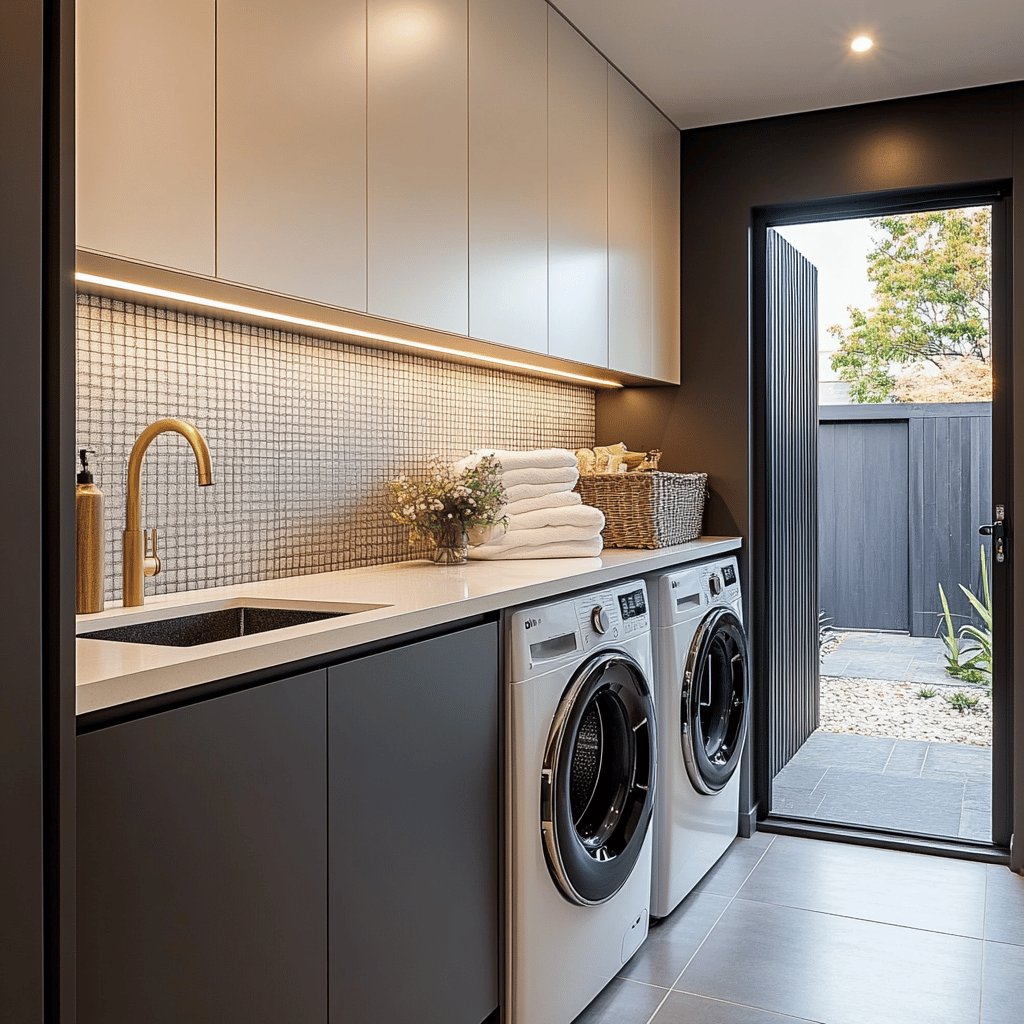
Never underestimate the power of paint and good lighting in your laundry room. I chose a light, bright color (Sherwin Williams’ Alabaster) for the walls, which immediately made the space feel larger and more inviting. The paint cost around $30, but the transformation was dramatic.
The room’s original builder-grade light fixture cast harsh shadows and made the space feel cave-like. I replaced it with a modern LED fixture I found on clearance for $40. The improved lighting made a world of difference in both functionality and atmosphere.

Space-Saving Laundry Room Hacks That Cost Nothing
Some of my favorite space-maximizing solutions didn’t cost a dime:
I started using slimline hangers instead of bulky plastic ones. This simple switch freed up considerable hanging space and gave the room a more cohesive look. I already had these hangers but wasn’t using them effectively.
I implemented the “one in, one out” rule for laundry supplies. Before buying any new products, I make sure to use up what I have. This prevents clutter and saves money in the long run.

Creating a Functional Workflow
In a small laundry room, every inch needs to work hard. I mapped out a logical workflow that made the most of my limited square footage:
I designated specific zones: sorting area (using collapsible hampers), washing/drying zone, folding space (using the top of the dryer), and storage. This organization system helps prevent clothes from piling up and makes the whole process more efficient.

Budget-Friendly Finishing Touches
To make the space feel more polished and personal, I added some inexpensive decorative elements:
- A small indoor plant in a pretty pot brightens up the room and improves air quality
- A vintage-style metal sign found at a thrift store adds character
- A small bluetooth speaker (a gift I rarely used) now provides entertainment while I fold
- A hook-mounted ironing board saves floor space and adds visual interest when not in use

Real Talk: The Challenges and Solutions
Let’s be honest – not everything worked perfectly on the first try. The first shelf brackets I bought weren’t strong enough, and I had to reinforce them. My initial organization system needed tweaking after a few weeks of real-life use. But that’s part of the process, and learning from these mistakes helped me create a space that truly works for my needs.
Tips for Your Own Budget Makeover
If you’re planning your own laundry room makeover, here are my top tips:
- Start with a detailed plan and budget. Know exactly what you need versus what you want.
- Shop sales and clearance sections. I saved significantly by timing my purchases with store sales.
- Don’t be afraid to DIY. Simple projects like painting and basic shelving installation are totally doable with some research and patience.
- Focus on functionality first, then add decorative elements.
- Get creative with storage solutions – sometimes the best options aren’t marketed as laundry room organization products.

The Impact: More Than Just Organization
This makeover did more than just improve the functionality of my laundry room. It transformed a space I used to avoid into one that actually makes household chores more enjoyable. The organization systems save me time, and the improved aesthetics lift my mood. Most importantly, it proved that you don’t need a huge budget to make significant improvements to your home.

Final Thoughts
Looking back, this budget-friendly makeover taught me valuable lessons about maximizing small laundry room spaces and being resourceful. The key is to work with what you have, think creatively about storage solutions, and focus on changes that make the biggest impact. Remember, you don’t need to do everything at once – small, strategic improvements can add up to a significant transformation.
Your laundry room might be small, but with some planning, creativity, and smart shopping, it can become a space that works efficiently and brings joy to your daily routine. Start with one improvement at a time, stay within your budget, and watch your laundry room transform into a functional, organized space you actually enjoy spending time in.
What budget-friendly improvements have you made to your laundry room? I’d love to hear your creative solutions in the comments below!
Below are some articles I think you might like.
European-Inspired Laundry Room Design Elements


DIY Kitchen Pantry Organization on a Budget
January 10, 2025 @ 12:32 pm
[…] Laundry Room Makeover on a Budget: Space-Maximizing Tips […]
Creating Conversation Areas: Tips for Your Living Room
January 12, 2025 @ 5:20 pm
[…] Laundry Room Makeover on a Budget: Space-Maximizing Tips […]
Coffee Table Styling Through Seasons: A Year-Round Guide
January 15, 2025 @ 12:56 pm
[…] Laundry Room Makeover on a Budget: Space-Maximizing Tips […]