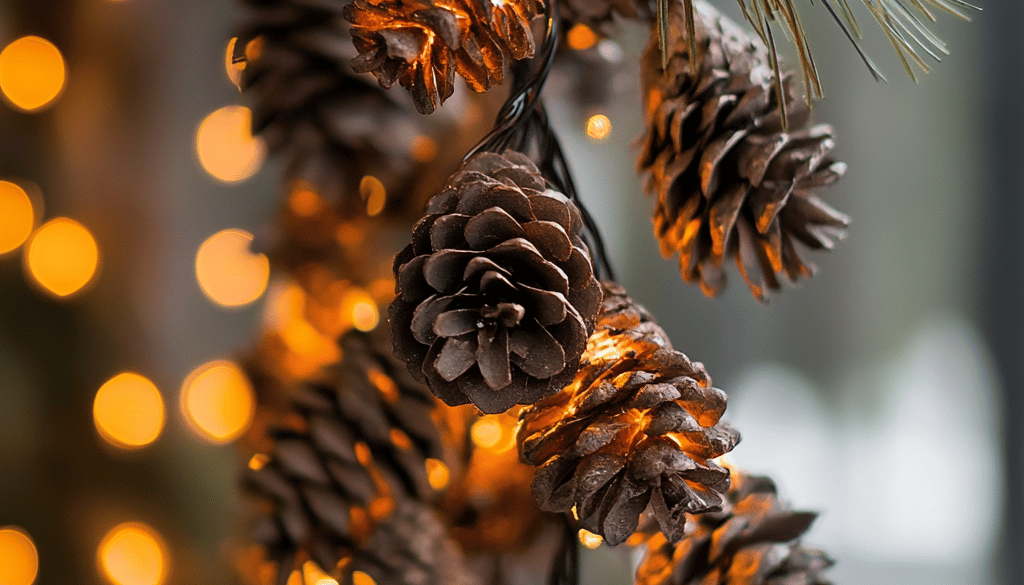
How to Create Stunning Pinecone Garlands
I’ve always believed that the best decorations are the ones nature provides. After years of crafting seasonal decorations, I’ve found that pinecone garlands are one of the most versatile and beautiful ways to bring the outdoors in. Today, I’m excited to share my complete guide to creating gorgeous pinecone garlands that will transform your home into a winter wonderland.
Below are some of my favorite products for decorating my home for winter.


Why Pinecone Garlands Are Perfect for Winter Decor
Let me tell you why I love pinecone garlands so much. They’re incredibly versatile and can work in any space. I’ve used them to dress up my fireplace mantel, wind them around my staircase, and even create stunning window treatments. The best part? They’re budget-friendly and eco-conscious since you can collect pinecones right from your backyard or local park.

Gathering Your Materials
Before we dive into the crafting process, here’s everything you’ll need:
- Fresh pinecones (I usually collect about 20-30 for a standard 6-foot garland)
- Strong twine, fishing line, or wire
- Hot glue gun and glue sticks
- Drill with small bit (optional)
- Metallic spray paint (optional)
- White craft paint (optional)
- Glitter (optional) Clear sealant (optional)
- Small decorative elements like artificial berries or eucalyptus (optional)

Preparing Your Pinecones
I learned this the hard way: you can’t just bring pinecones inside and start crafting. Here’s my tried-and-true preparation process:
First, I inspect each pinecone for quality. I look for ones that are fully opened and free from major damage. Size consistency is important, but I like to mix in a few different sizes for visual interest.
Next comes the cleaning process. I fill my bathtub with warm water and add a cup of white vinegar. The pinecones get a good soak for about 30 minutes. You’ll be amazed (and maybe a little grossed out) by what comes out! The warm water causes the pinecones to close up, but don’t worry – they’ll open again as they dry.
After soaking, I spread them on old towels and let them dry completely. This usually takes 2-3 days. Once they’re dry, I bake them at 200°F for about an hour. This step is crucial as it kills any remaining insects and causes the pinecones to open fully.

Creating Your Basic Garland
Now comes the fun part! I’ve tried several methods for stringing pinecones, and here’s what works best:
Method 1: The Wire Wrap
This is my go-to method for sturdy garlands. I use floral wire to create small loops around the base of each pinecone. Then, I string these loops onto a stronger wire or twine. This method gives you the most control over pinecone placement and creates a garland that lasts for years.
Method 2: The Drill and String
For this method, I carefully drill small holes in the base of each pinecone. Then, I thread my twine or fishing line through each hole. This creates a more natural-looking garland where the pinecones appear to float. Just be careful when drilling – pinecones can be surprisingly tough!
Method 3: The Hot Glue Method
This is the quickest method, but requires attention to detail. I create small loops with my twine and hot glue them to the base of each pinecone. The key is using plenty of glue and holding each loop in place until it’s completely cool.

Adding Personal Touches
Here’s where you can let your creativity shine! I love experimenting with different decorative elements:
Natural Look
Sometimes I weave in small sprigs of artificial evergreen or eucalyptus between the pinecones. This adds fullness and a lovely forest feel to the garland.
Sparkly Winter Wonder
For a more glamorous look, I lightly brush the tips of the pinecones with white craft paint or spray them with a bit of glitter spray. The key is subtle application – you want it to look like a natural frost.
Mixed Metals
One of my favorite techniques is adding metallic touches. I’ll spray some pinecones with gold or silver paint, leaving others natural. This creates a beautiful, sophisticated look that works well for both winter and holiday decorating.

Installation Tips and Tricks
After making countless garlands, I’ve learned some valuable lessons about installation:
- Always measure your space before starting. I add an extra foot on each end for draping.
- Use removable adhesive hooks for hanging. They won’t damage your surfaces and can be easily adjusted.
- For staircase installations, I secure the garland every 2-3 feet to prevent sagging.
- When draping across a mantel, I use small command hooks on the underside for invisible support.

Maintaining Your Garland
Your pinecone garland can last for several seasons with proper care. I dust mine regularly with compressed air or a soft brush. Keep it away from direct heat sources, which can cause the pinecones to close up. When the season ends, I store my garland in a large plastic storage bin with some cedar blocks to keep insects away.

Creative Display Ideas
Let me share some of my favorite ways to use pinecone garlands:
Mantel Magic
I love draping a garland across my fireplace mantel, letting it cascade slightly at the ends. Sometimes I’ll weave in some battery-operated fairy lights for evening ambiance.
Staircase Beauty
Winding a garland around your staircase railing creates a stunning natural element that draws the eye upward. I usually secure it with clear zip ties that can be easily hidden.
Window Wonder
Hanging a shorter garland above windows adds unexpected charm. I like to let it drape slightly in the center for a graceful effect.
Door Frame Drama
Framing a doorway with a pinecone garland creates a magical entrance. This works especially well for larger doorways or archways.

Troubleshooting Common Issues
Even experienced crafters run into problems sometimes. Here are solutions to common issues I’ve encountered:
Problem: Pinecones Won’t Stay Closed
Solution: If your pinecones keep closing up, they might be too fresh. Try baking them longer at a low temperature.
Problem: Garland Feels Too Heavy
Solution: Mix in some lighter-weight artificial elements or use smaller pinecones in sections.
Problem: Uneven Spacing
Solution: Lay out your entire garland before securing any pieces permanently. This helps you adjust spacing for a balanced look.

Final Thoughts
Creating pinecone garlands has become one of my favorite winter crafting traditions. There’s something deeply satisfying about transforming simple natural elements into beautiful decor that can last for years. Whether you’re an experienced crafter or just starting out, I encourage you to give it a try. The process is forgiving, and the results are always charming.
Remember, there’s no “perfect” way to create a pinecone garland. Each one is unique, just like the pinecones themselves. Let your creativity guide you, and don’t be afraid to experiment with different techniques and decorative elements.
I hope this guide has inspired you to create your own natural winter decorations. If you have any questions about making pinecone garlands, feel free to leave them in the comments below. Happy crafting!
If you love decorating for the different seasons as much as I do, check out these other articles I think you might like.
15 Ways to Decorate with Pinecones After Christmas
How to Create a Magical Frosted Pinecone Centerpiece
Creating Magical Winter Window Displays with Pinecones
How to Create Stunning Hurricane Vase Displays with Pinecones
How to Create a Stunning Winter Pinecone Wreath


How to Create Winter Displays With Pinecones & Apothecary Jars
December 19, 2024 @ 1:56 pm
[…] How to Create Stunning Pinecone Garlands […]
How to Create Winter Coffee Table Arrangements with Pinecones
December 20, 2024 @ 2:03 pm
[…] How to Create Stunning Pinecone Garlands […]
Pinecone Cabinet Pulls: Transform with Natural Winter Charm
December 21, 2024 @ 2:37 pm
[…] How to Create Stunning Pinecone Garlands […]
Creating Cozy Winter Magic with Pinecone Basket Displays -
December 22, 2024 @ 2:27 pm
[…] How to Create Stunning Pinecone Garlands […]
How to Create a Magical Winter Terrarium with Pinecones
December 25, 2024 @ 2:09 pm
[…] How to Create Stunning Pinecone Garlands […]